
Are you a new drummer who has no idea where to start when it comes to drum tuning, or an experienced player who’s just never managed to nail your perfect sound? This resource will give you everything you need to be a tuning machine.
In this guide, you’ll learn how to tune each type of drum, the dos and don’ts of drum tuning, several different methods for tuning, and tools and resources that will help you get your drums to sing.
And in the video above, you’ll learn just one of several methods to tune your drums. However, there’s nothing better than getting in your practice space, taking off the heads, and trying different things.
(Pssst…if you’re a new drummer, sign up for this easy-to-follow video course that’ll teach you how to hold drumsticks, play your favorite songs, and much more for only $7! You’ll be drumming with confidence within 90 days, no joke.)
“Tune drums? But isn’t it a rhythmic instrument?” Whether you want each drum to sound like a specific ‘note’ or not, you need to tune your drums to get a good sound. When you’re learning how to play drums, the better they sound and feel, the more inspired you’ll be to keep drumming.
Every drummer has their own method for tuning drums. While they might be slightly different, all methods are generally based on the same foundation.
Once you’ve set up your drums, the next step is making them sound awesome.
We tune drums for many reasons, including:
Most drumheads – at least the ones you’ll find on a standard drum kit – are made of mylar plastic. You can probably imagine how a circular sheet of plastic would sound if you stretched it at random and hit the center: not very good.
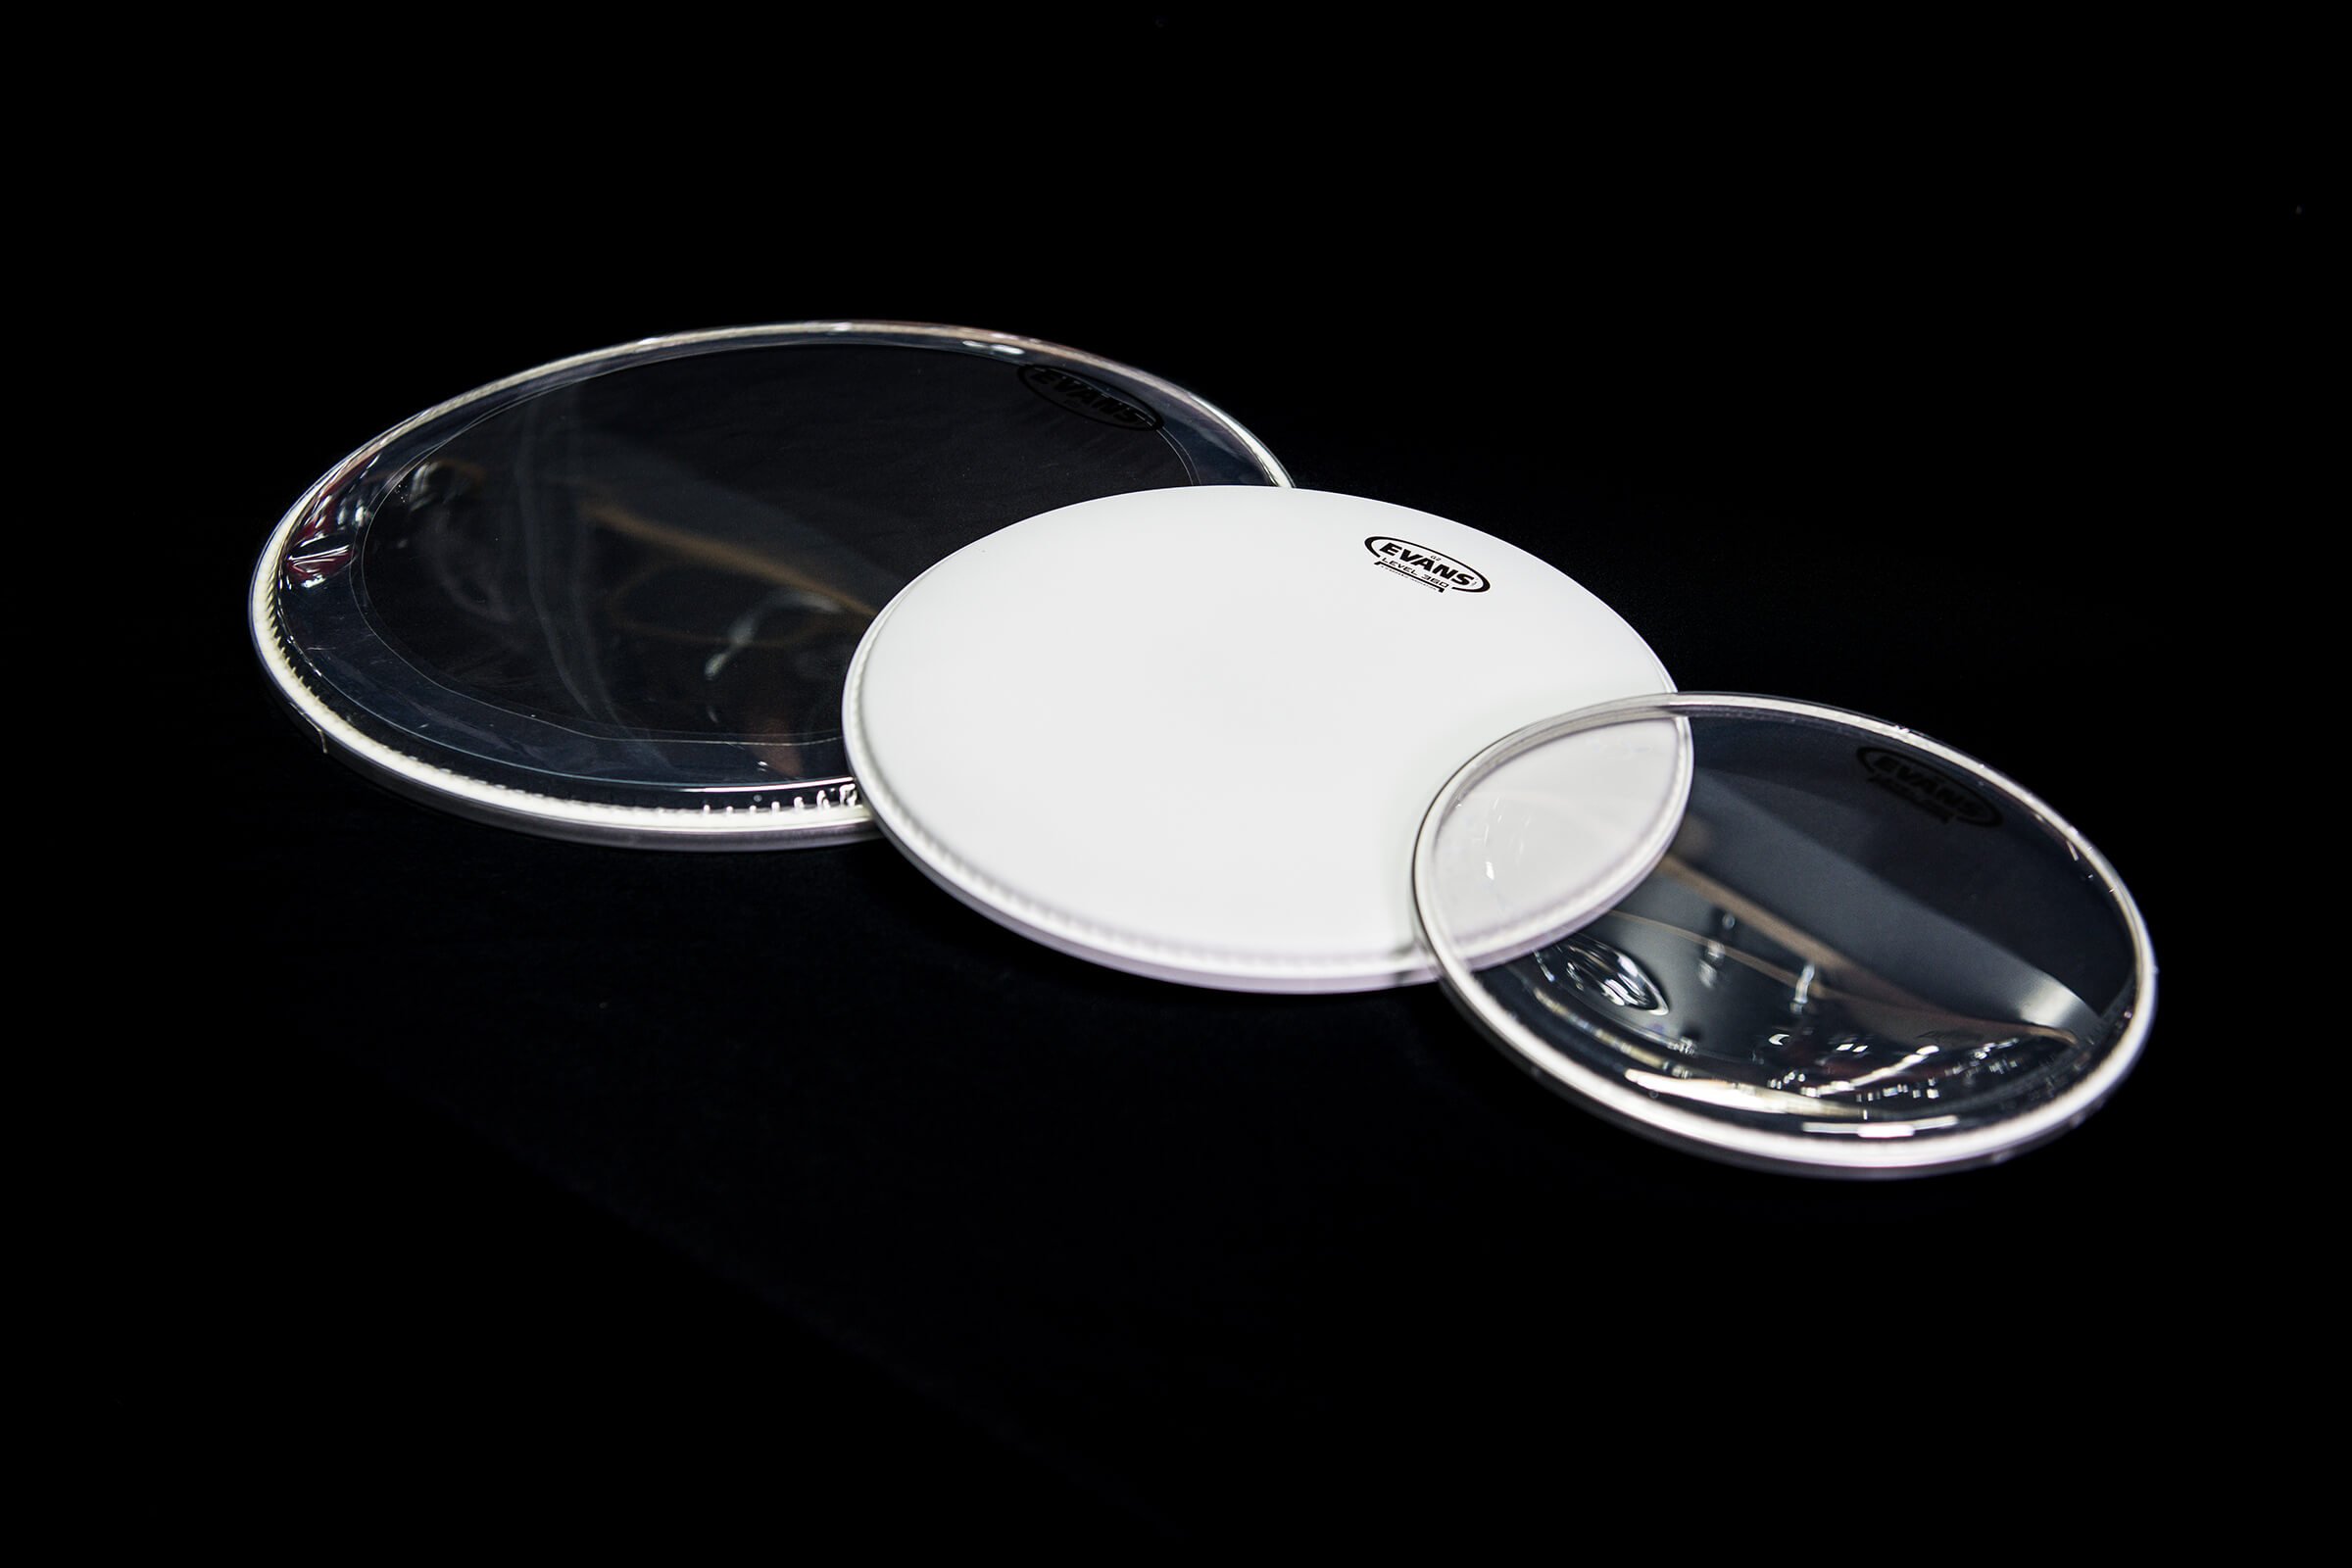
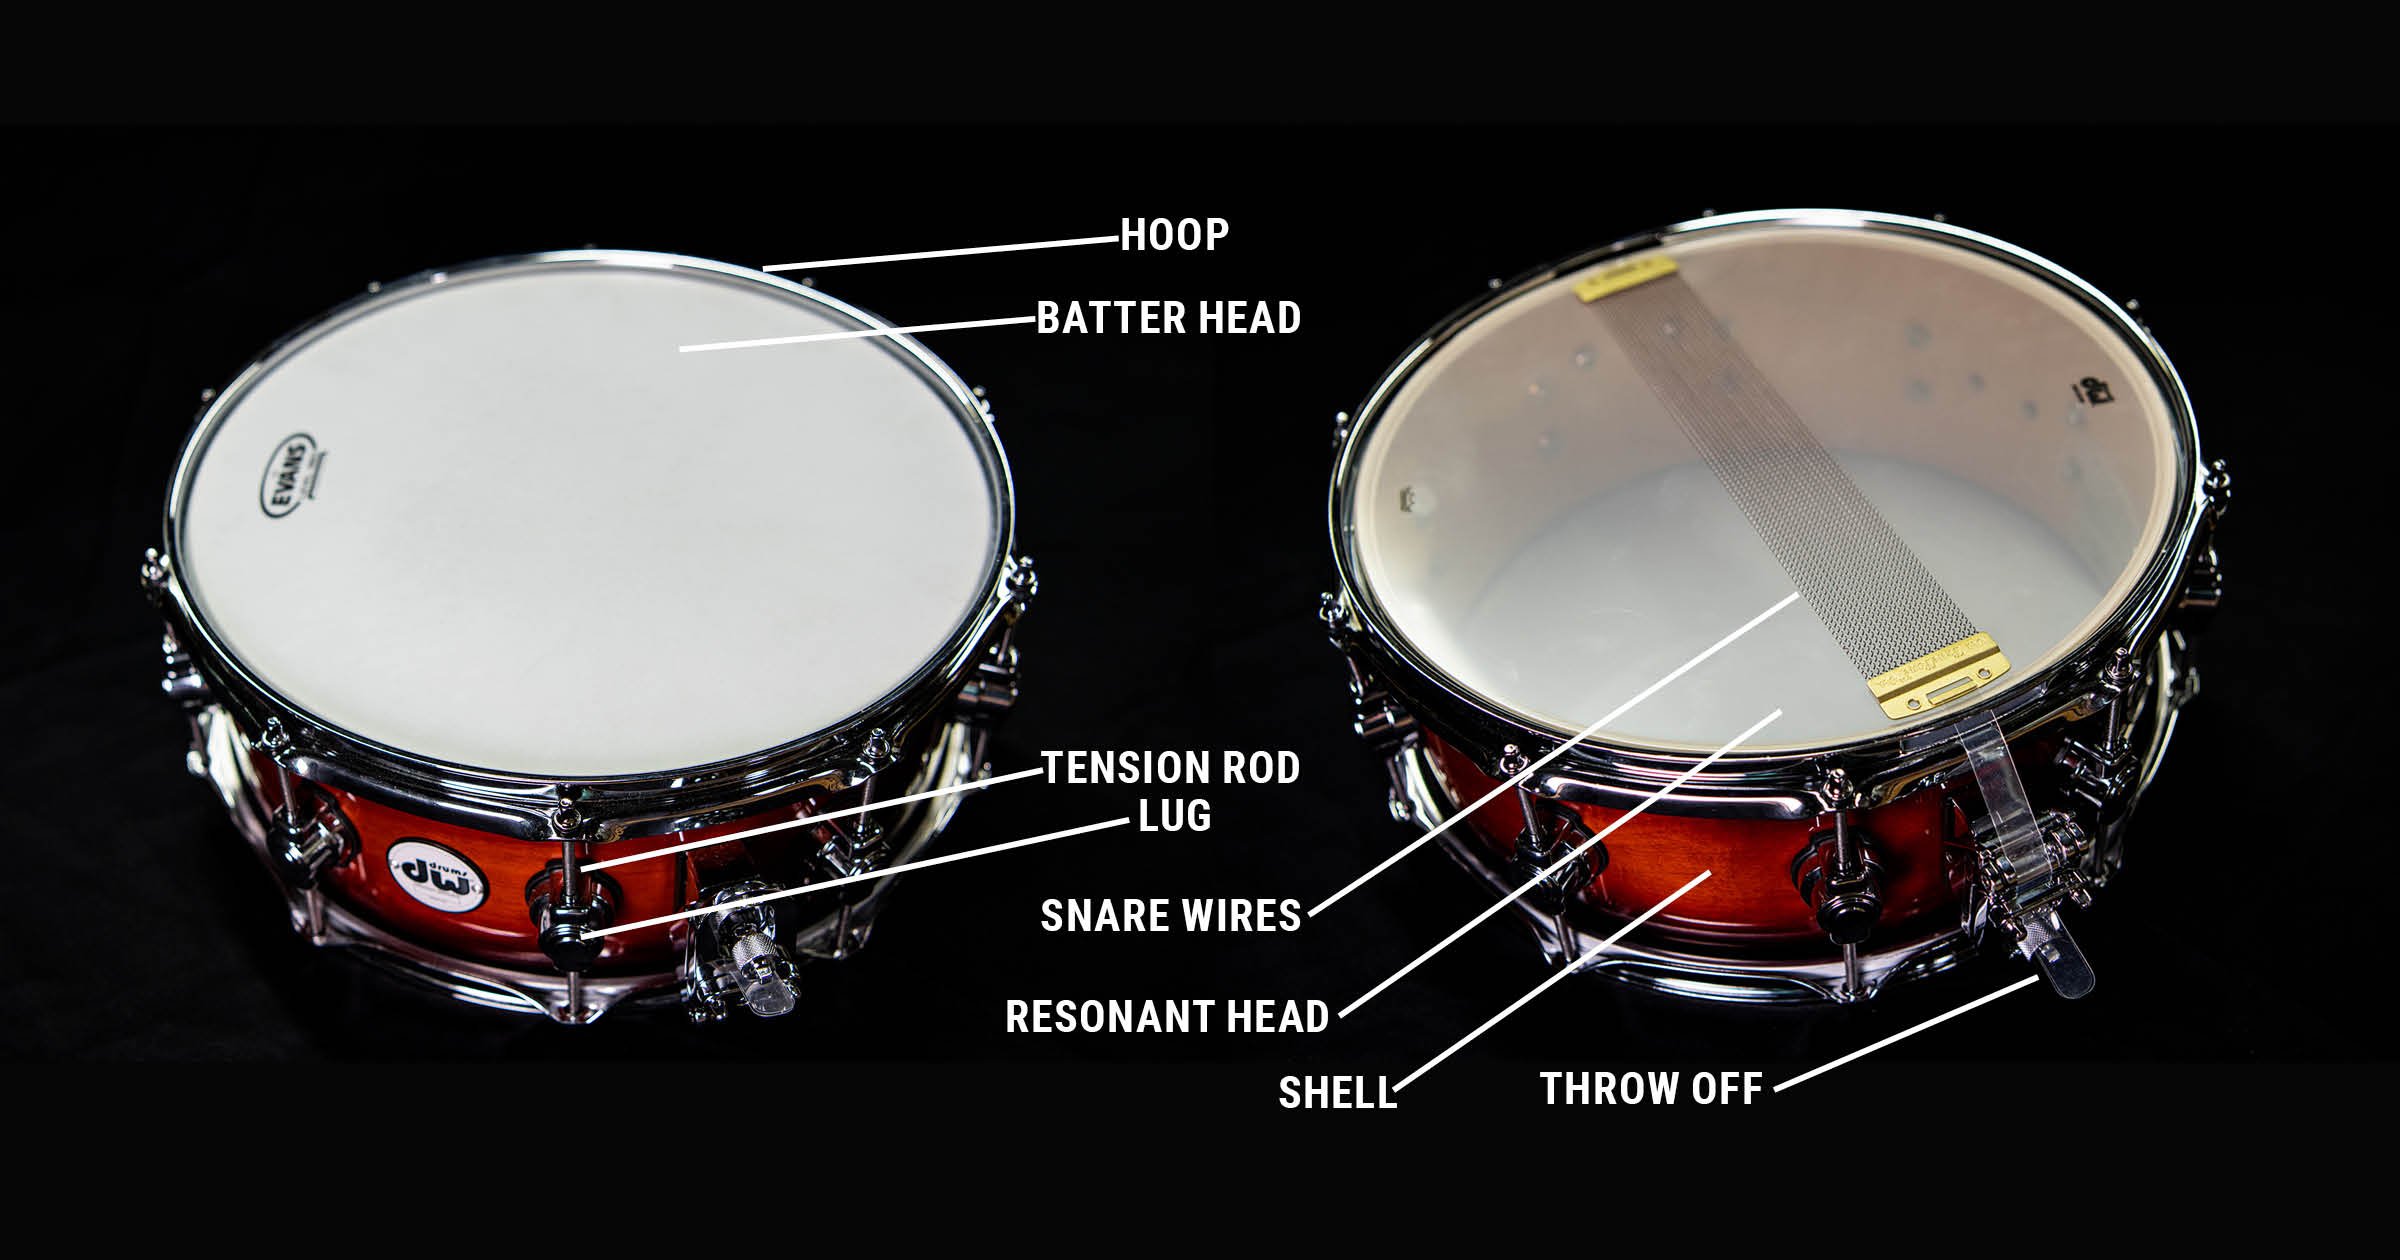
Most modern drums have one drumhead on each end of the shell: a top head (batter head) and a bottom head (resonant head). The two heads play off each other, which is why it’s important to tune them both so they vibrate together harmoniously.
Different drums also have different frequencies and pitches that will resonate that shell a certain way, so ‘finding the sweet spot’ in tuning can differ from one drum to the next. To make each drum sound as good as possible, the drumhead needs to be manipulated through tension so it vibrates in harmony with the shell and all of its components. The key is to start with an even tension around the head and adjust from there.
Historically, drumheads were made from animal skins – hence why they were regularly called ‘skins’ until more recently. Before we had lugs and tension rods (essentially metal screws), drumheads were usually held in place and ‘tuned’ with sinew or rope. Drummers and inventors have experimented with different ways to get new and better tones, but today we tune most drums by using their tension rods (with the exception of timpani, traditional instruments and unique kits).
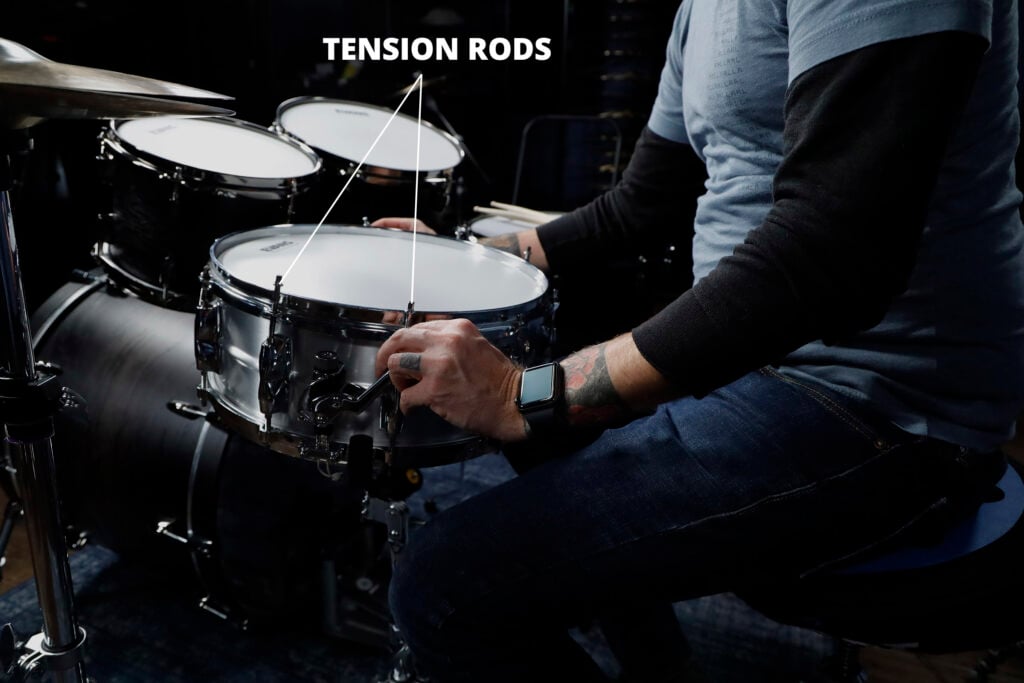
For the purpose of this guide, we’re only going to be talking about the most common modern drum set tuning.
Ask yourself these questions:

If you’re jamming alone in your basement and you aren’t denting the heads, you might only tune your drums every 6-12 months. They’ll definitely go out of tune long before then, but as long as they sound and feel good enough to you, that might be all you need to keep you happy.
However, if you’re a gigging or recording drummer – or you want to make sure your drums sound as good as they can, considering how much money you’ve invested in them – you might be tuning your kit once a week, once a day, or even between songs (which is the case in most studio situations).
Drums can go out of tune for a number of reasons. Drastic changes in temperature can cause the shell to expand or shrink, loosening the tension rods. Bumping or shaking the drum during transport or excessive playing can have the same effect. So if you want the drums to sound as good as possible, you should be checking their tuning regularly.
And of course, if your drumheads are old or have ‘pock marks’ or dents in them, you should replace them. Check out the ‘how to choose drumheads’ section in this guide to playing drums.
To get your drums ready for tuning, you’ll need to start with zero tension, which means de-tensioning all batter heads. Some people use a drill to loosen it more quickly, and if you do this on a high tension drum like a snare, make sure you don’t completely loosen one tension rod at a time. Instead, go slowly around the entire snare – loosening bit by bit – or do it in a star pattern.
The more experience you have, and the better ‘ear’ you develop, the quicker you’ll be able to tune a drum. Some people claim to be able to do it in a matter of minutes, but it’s more common to take 15-30 minutes per drum to really make it sing. You can get proficient at tuning your own kit, but trying to tune drums you aren’t familiar with can be more difficult.
Learning to tune drums takes time and patience. It’s all about trial and error, and there’s no true ‘shortcut’. While there are tools that can help you get the tension or pitches you want, they aren’t perfect and you’ll get the best results when you use them in tandem with your own ears.
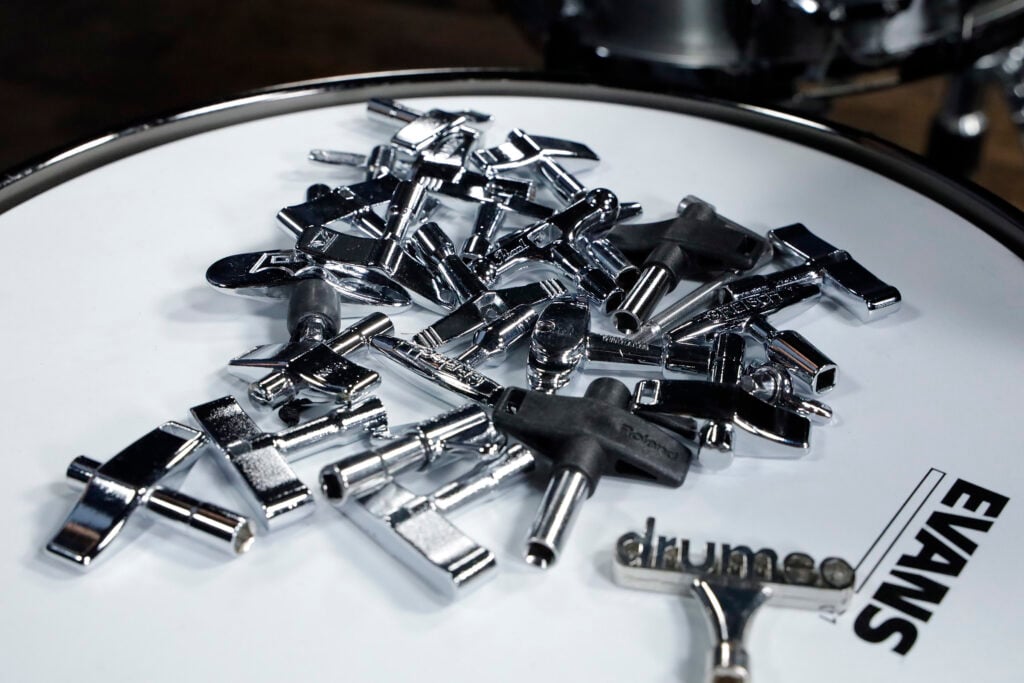
Drum key
Every drummer needs a drum key for tuning (or shop drum keys in Europe). They’re cheap and you can grab one at a local music store or order one online, and most new drum kits will come with one. It’s a good idea to have several at your disposal – especially on a keychain or in your wallet – so you’re always able to tune your drums whether you’re at a gig, in the studio, or elsewhere.
Can you tune drums without a drum key? Technically, yes. If you have a small socket wrench or a set of flat pliers, you can use those to turn the tension rods. But it’ll take much longer and you risk damaging the rods.
Tuning apps
While these won’t replace a trained ear for tuning, there are apps that play different tones you can use as reference points while tuning. Some other digital tuning aides come with their own apps as well.
Drumtune PRO detects the pitch your drum is at and helps you get the notes you want. It can also save your settings so you don’t have to start from scratch every time.
If you don’t want to shell out a few bucks for an app, you can download a free chromatic tuner that will play a note (like a piano) you can then try to match with the drum.
Tuning aides
While you shouldn’t fully rely on gadgets and apps to get your kit sounding its best, they can definitely help you get there.
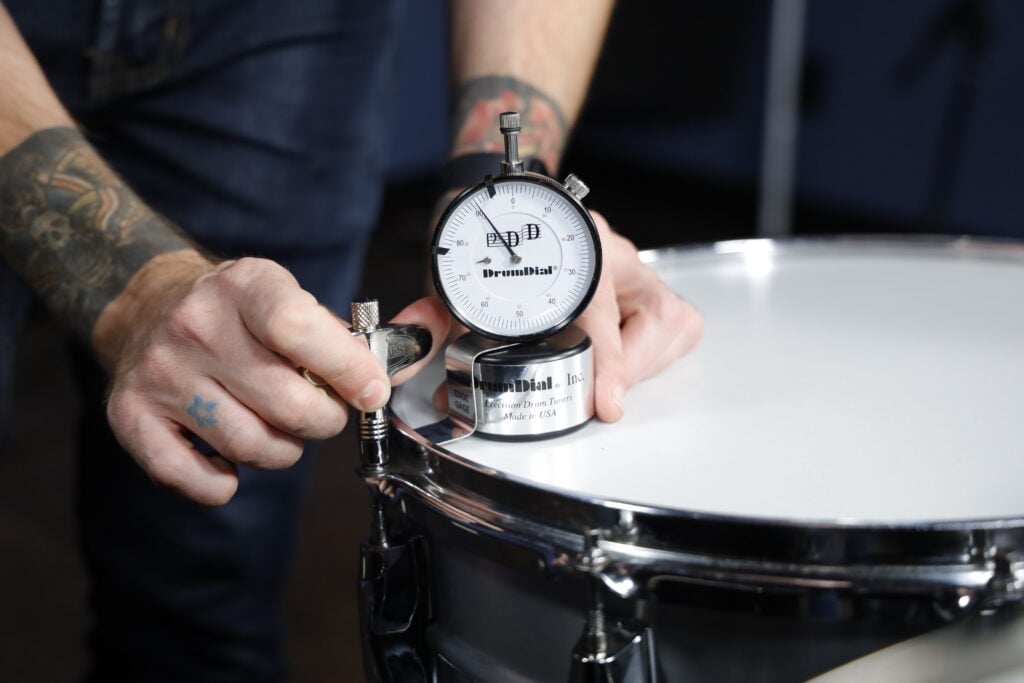
The DrumDial is a long-running analog staple for drummers (the TAMA Tension Watch is a similar product). It helps you match the tension around your drumhead and provides a great starting point for tuning. You can find drum tuning charts online if you aren’t sure where to start.
If you’re looking for something that will help you tune your drums to certain pitches, the Tune-Bot is a digital option that also lets you save the notes you’ve chosen.
Evans also makes a tool called the Evans Torque Key, which is a drum key you can use to dial in the tension you want, and it’s designed to recognize and help you get each tension rod even.
Drums have a certain range of pitches where they resonate naturally, and this can change depending on the drum’s size and material. Finding the right frequencies for each drum will help you get the best sound out of it. But keep in mind that tuning is also a personal preference, and two drummers who are equally capable at tuning and who both have a well-trained ear may tune the same kit differently.
Note: What does it mean to have a ‘well-trained ear’, exactly? You should be able to recognize when notes are pitched higher or lower, hear when there’s a difference between them, and recognize when notes are in or out of tune with one another.
When tuning toms (there are typically two or three on a standard kit), you can tune each tom to a ‘note’ with the same interval – or melodic distance – between each one. Try tuning the highest tom first, and then work your way down from there. The next tom should be perfect fourth (five semitones) lower. It might sound cheesy, but sing “Here Comes The Bride” or “George Of The Jungle” if you need a quick reference!
Perfect fourths (and perfect fifths) are great intervals to start out with because they’re non-dissonant, which means they’ll always sound good together.
Try this tuning on a jazz kit:
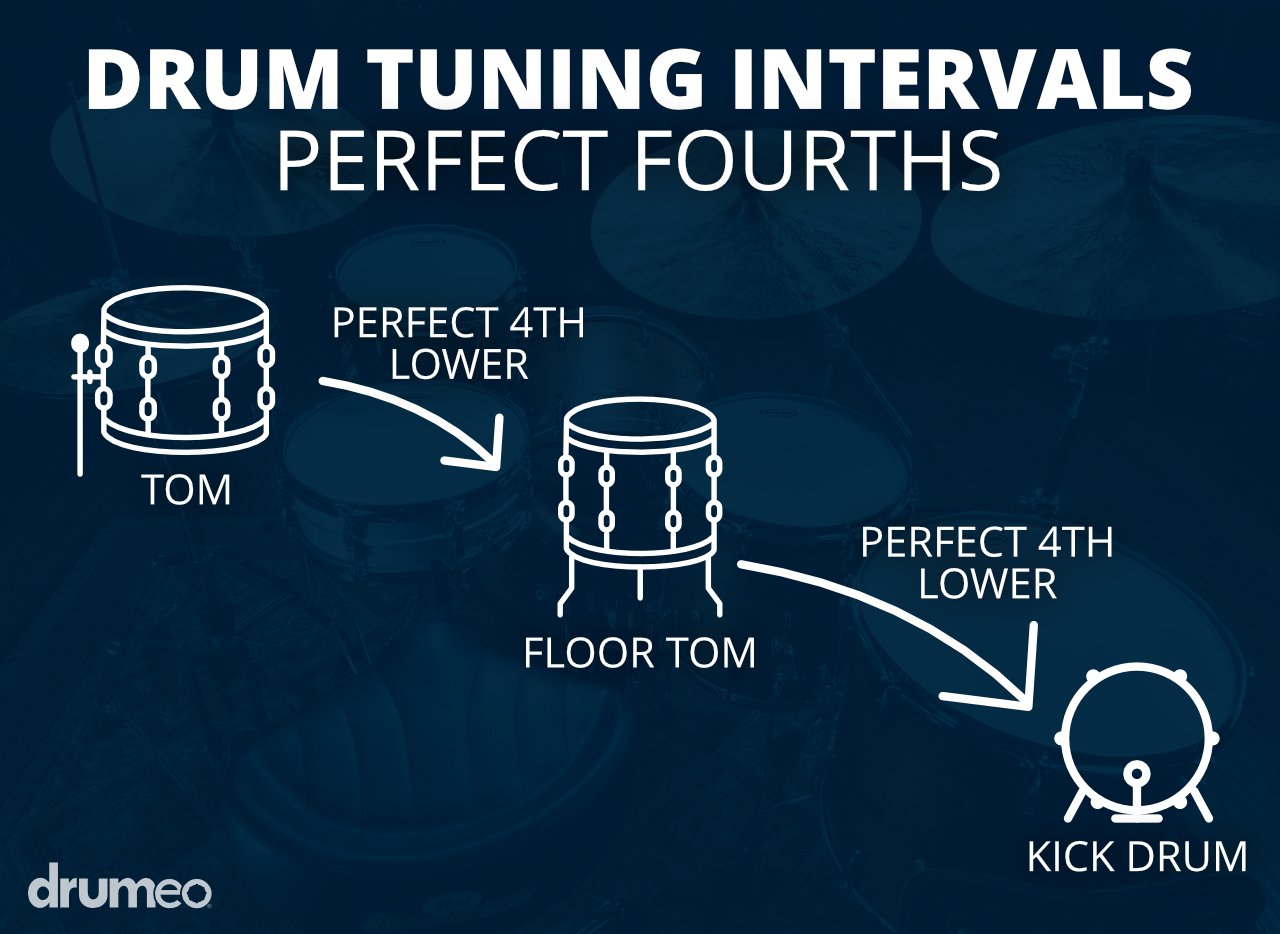
And this tuning on a rock kit:

If you’re familiar with melodic instruments, then you can take the concept of a chord – multiple notes played together in harmony – and apply it to the drum set. Unless you have a chromatic setup like Terry Bozzio or Ari Hoenig and have dozens of toms with each one tuned to a specific note, you probably only have a few drums to choose from. But if you want each drum to play a note, use one of the digital tools mentioned above (like the Tune-Bot) to help you get there.
Some drummers will tune so their drums are more in line with particular songs or to meet the expectations/vibe of the music they’re playing. For example, your toms should have a higher pitch when playing reggae, and lower when playing rock – these standards help to define each style of music.
It’s important to note that sometimes your shells will limit the results of your tuning. For example, if you have a deep snare, it will be hard to get an authentic reggae sound. If you have shallow toms, it will be difficult to get the ‘boom’ you might want as a rock drummer. A metal snare will resonate differently from a wood snare, and the same goes for acrylic.
In certain genres like rock or metal, tuning the bass drum or snare drum is often based on ‘feel’ (like the amount of rebound, tightness or softness) so it’s important to take that into consideration as well.
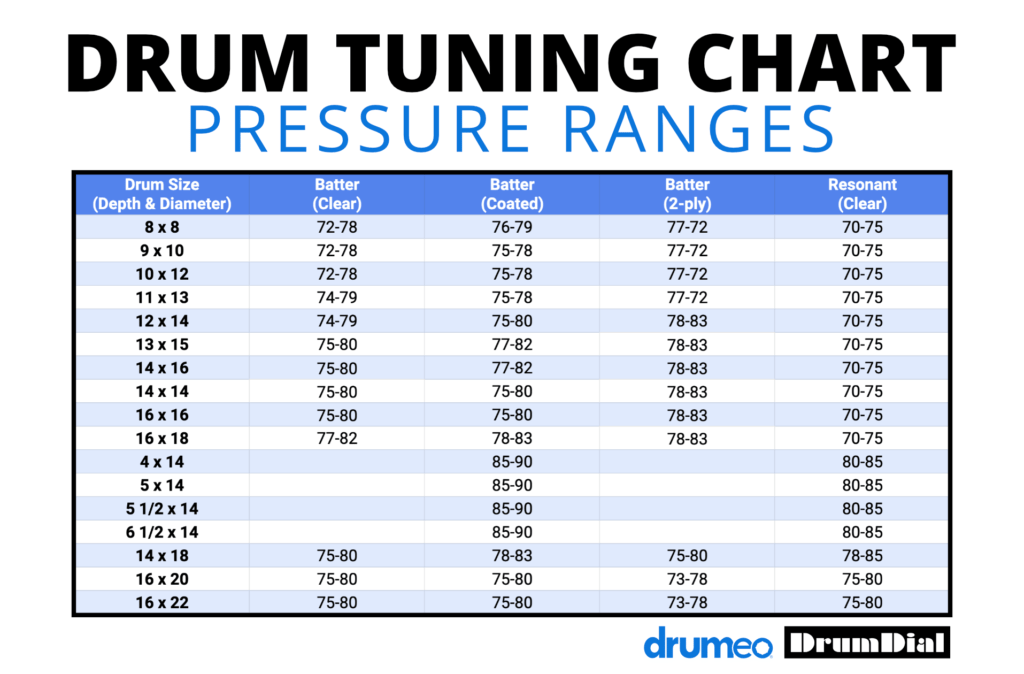
If you’re using a tuning aide that measures frequency, here’s a handy chart (designed by DrumDial) that shows you the approximate ranges to aim for.
Let’s look at some of the questions drummers have about why tuning works the way it does.
Why does each drum have a top and a bottom head?
When you strike a drum, it forces air down the shell, and the resonant (bottom) head helps the top head sustain its note by bouncing that air back and forth. It keeps the top head vibrating, so you get a longer sound. The thicker the bottom head, the more resonance you’ll hear.
What happens when you don’t have a bottom head?
You won’t get as much sustain. Two heads vibrating simultaneously transfers energy back and forth, and a single head also won’t provide as complex of a sound. It doesn’t mean you can’t prefer that sound; it was a popular choice for many drummers in the 80s!
How do you get rid of pitch bend?
This is when you hit a drum (often the floor tom) and the note sounds like it’s ‘dropping’ off at the end. Some drummers don’t want this boing, especially in a studio environment. It’s caused by the bottom head being tuned much lower than the top head. Try bringing the tension on that resonant head up.
You can also have pitch bend in the other direction, in which case you should lower the tension on the bottom head.
Do drumheads affect how a drum will tune?
Yes! For example, thinner single-ply heads resonate more quickly than thicker 2-ply heads, which will affect the final sound. A clear head will sound brighter and have more attack than a coated head. And if a drumhead has a built-in muffling ring (more common in bass drum heads), this will also affect the resonance (and sounds) you can get out of the drum.
Why do certain pitches cause the snares to buzz?
You might notice that hitting one of your toms causes your snare to buzz. It’s called ‘sympathetic vibration’, and it happens when two drums are tuned to the same (or close to the same) pitch. To counter this, first try to tweak the pitch of the tom. If that doesn’t work, you might need to adjust the tuning on the snare drum. Detuning the lugs around the snare bed can sometimes help decrease sympathetic vibration.
Don’t stress too much if you can’t get rid of the buzzing 100%. It’s an acoustic instrument, and sometimes there are too many factors at play. Drummers of all levels have had to adapt to this.
Use the drum key to loosen the tension rods around the hoop. Once they’re all loose, pull them out and remove the hoop. If there was already an old head on the drum, remove it and use a damp cloth to wipe down the inside of the drum and the bearing edge (the top edge of the shell).
Place the new drumhead on the drum. Spin the head in either direction to make sure it’s properly centered. Put the hoop back on and put the tension rods back in. Use your fingers to screw in the rods until you start to feel resistance (aka ‘finger tight’).


Note: Unless this is a brand new kit, you should try to always put the hoop back in the same place. Because it’s being hit over and over – especially if you’re doing rimshots – this can cause it to warp slightly, so if you rotate it when putting it back it can cause tuning issues and further warping to the hoop and drum.
Now you’re ready to tune!
Later in this guide, we’ll go into specific instructions and methods of tuning each drum individually, but let’s start with an overview.

Detune the heads on all of your drums, making sure each tension rod is completely loose.
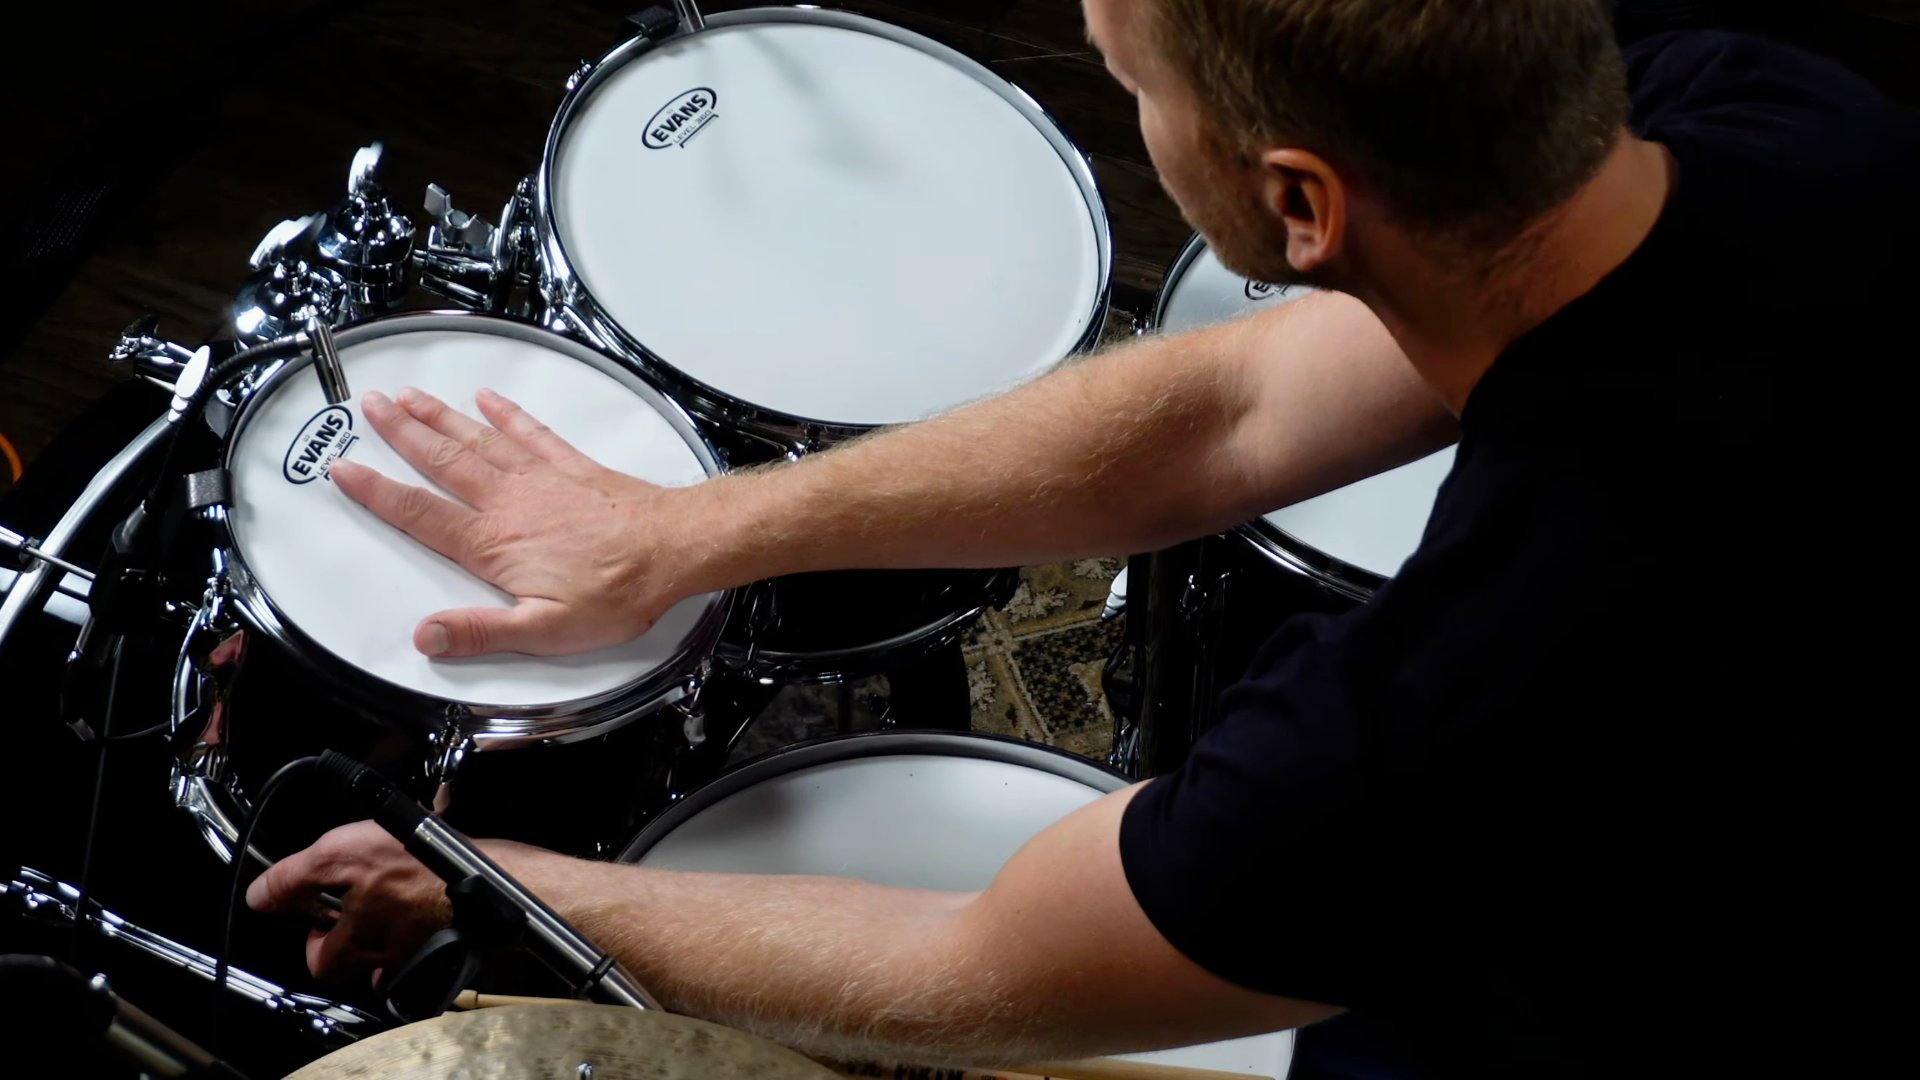
If you’re putting on new heads, seat each one by giving the tension rods one full turn and pressing firmly with both hands in the center of the head. You might hear a cracking noise in the drumhead, which is normal. This helps to stretch it out so it sits better.
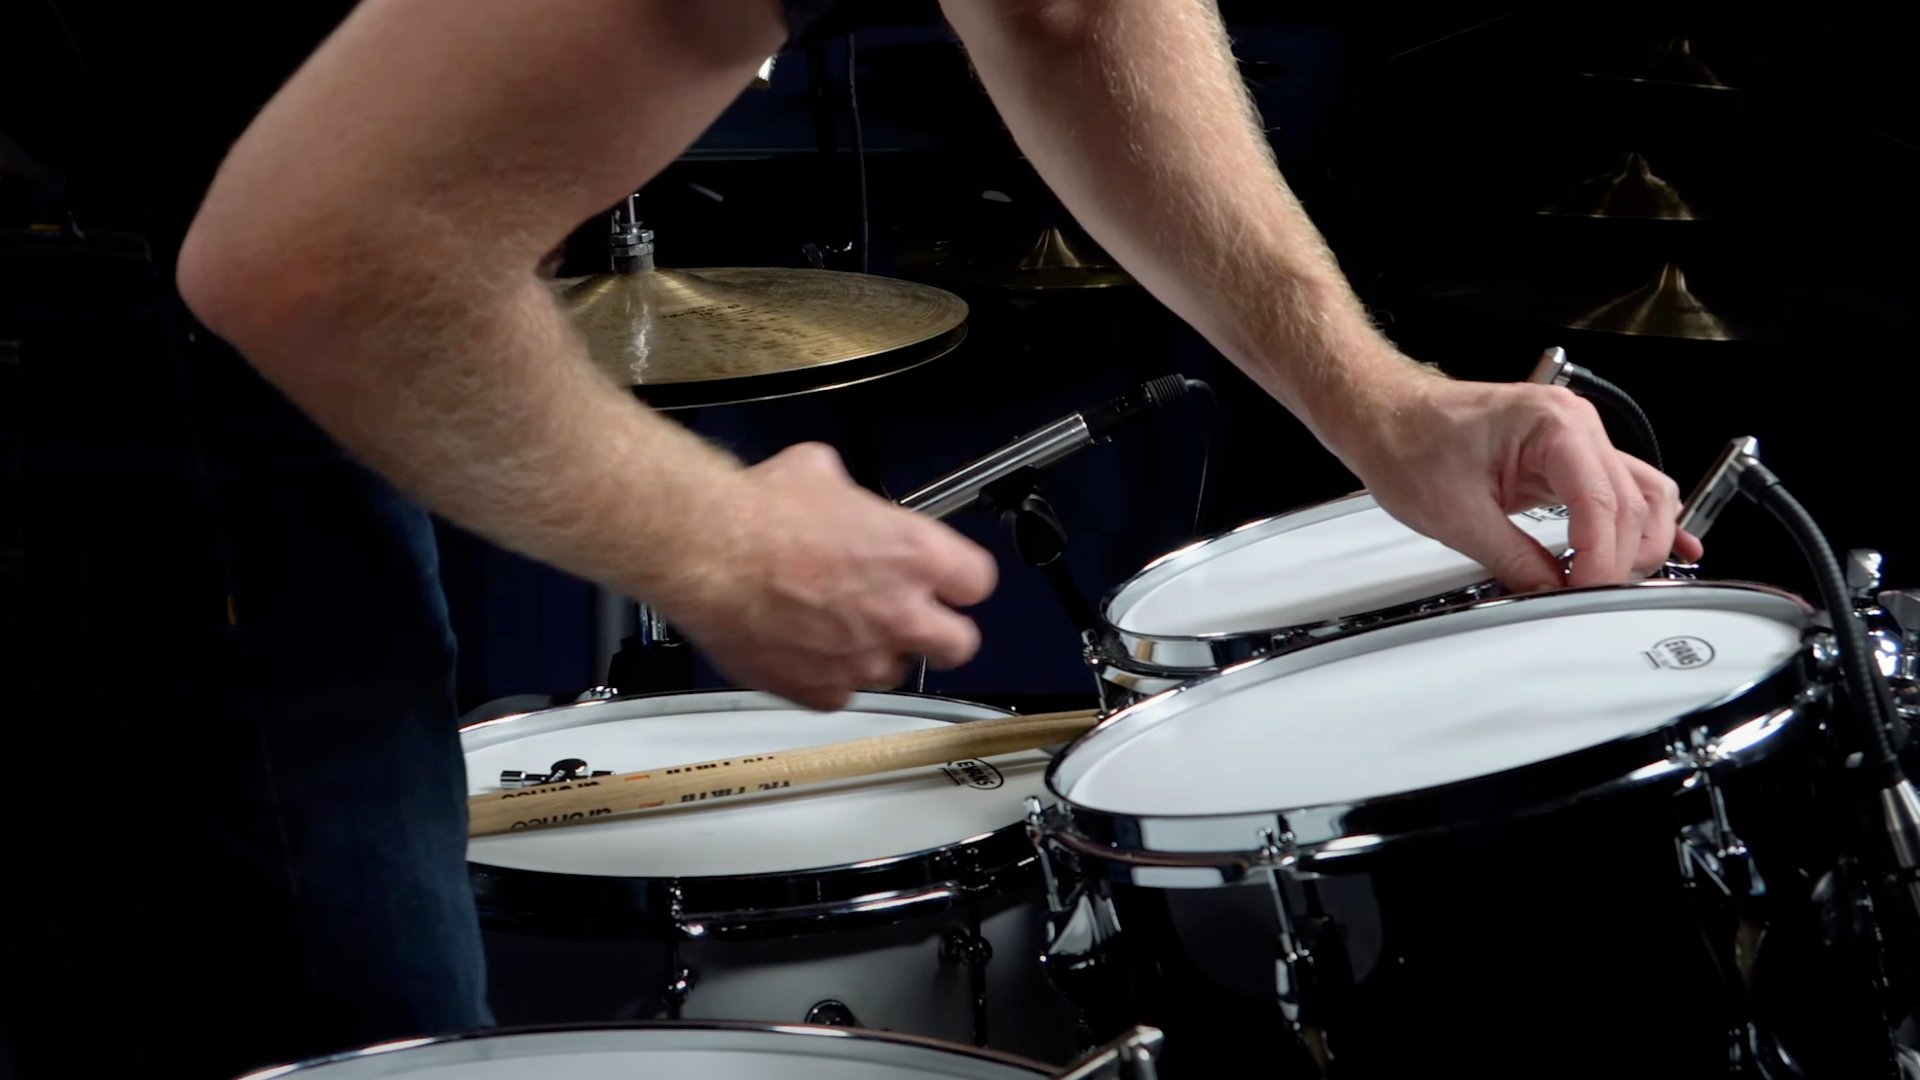
Detune the heads again and get ready to start tuning for real this time.

Start tuning one drum at a time, beginning with the high tom and moving down from there.
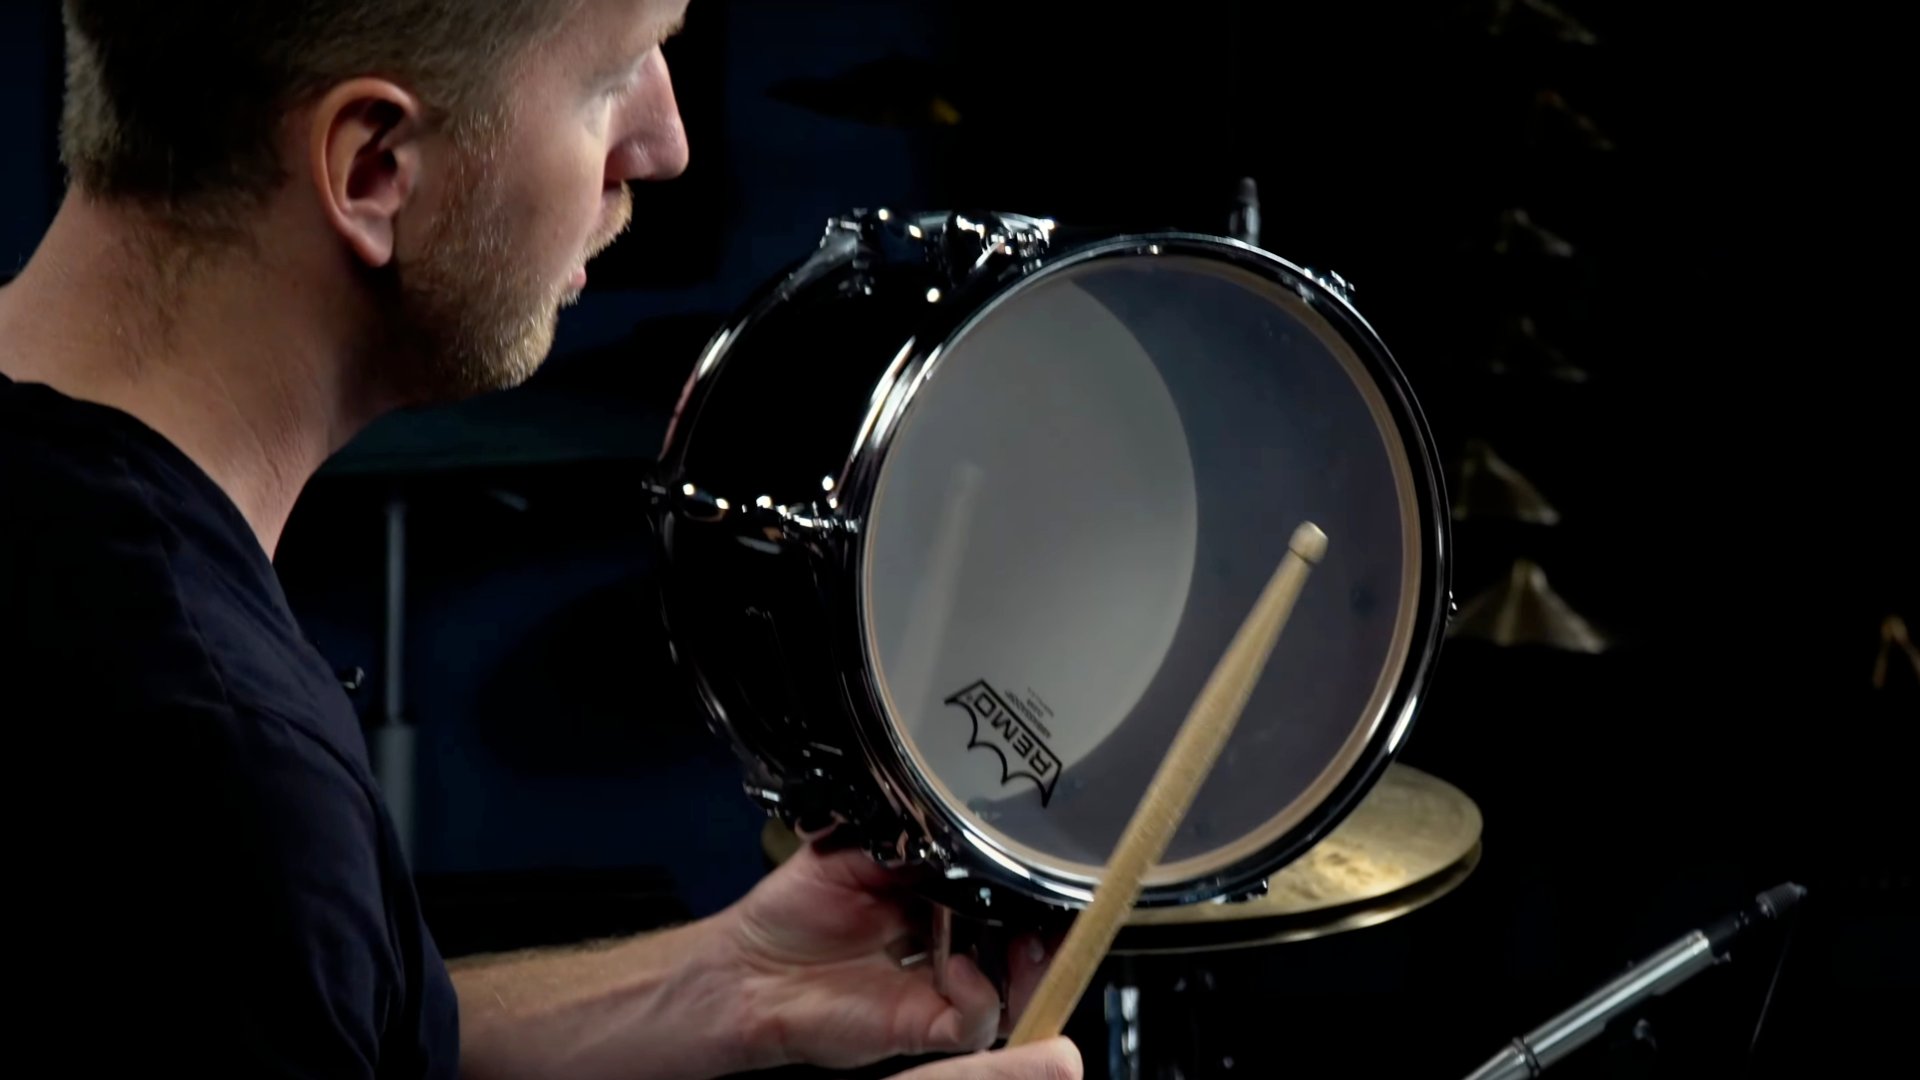
Decide if you want the bottom head to be higher, lower, or at the same pitch as the top head, depending on the sound you want to achieve. If you want your drum to “sing,” tune both heads to the same pitch.
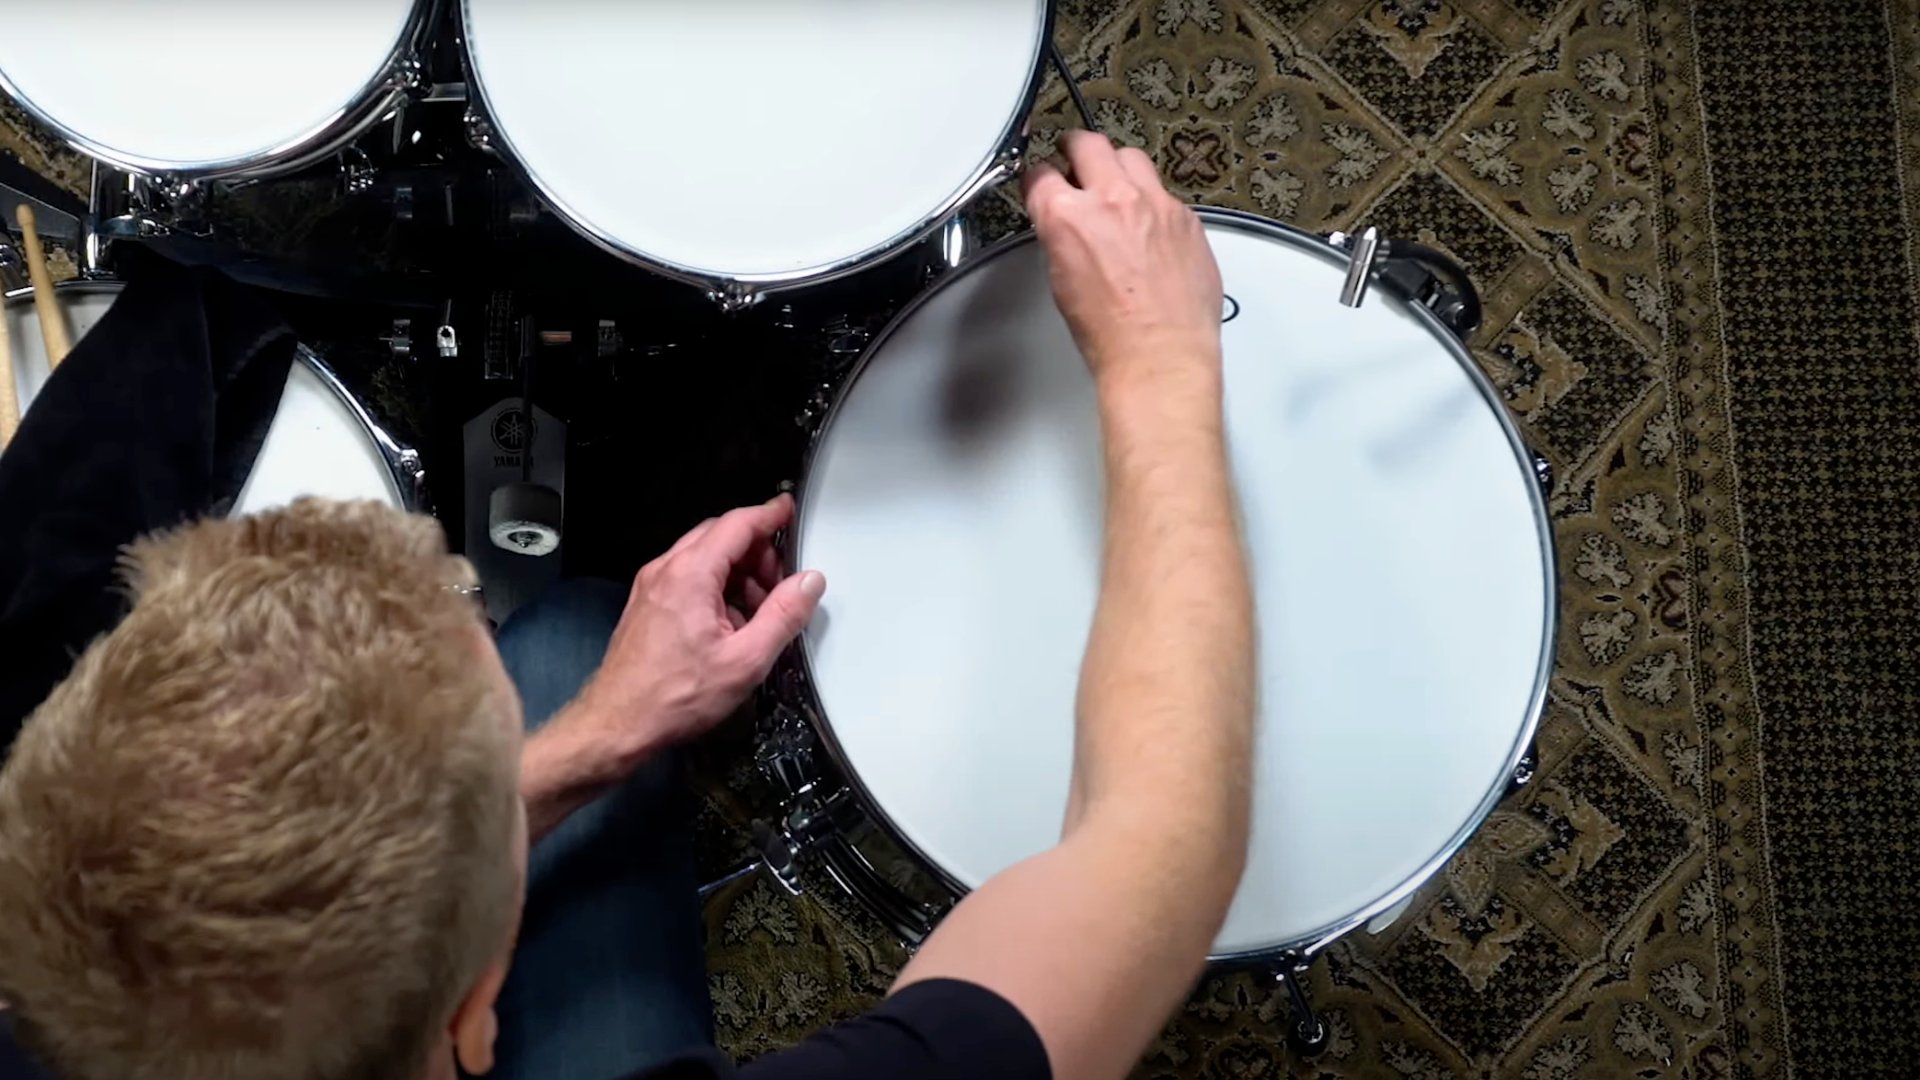
Repeat the process for each drum until you’re satisfied with the sound.
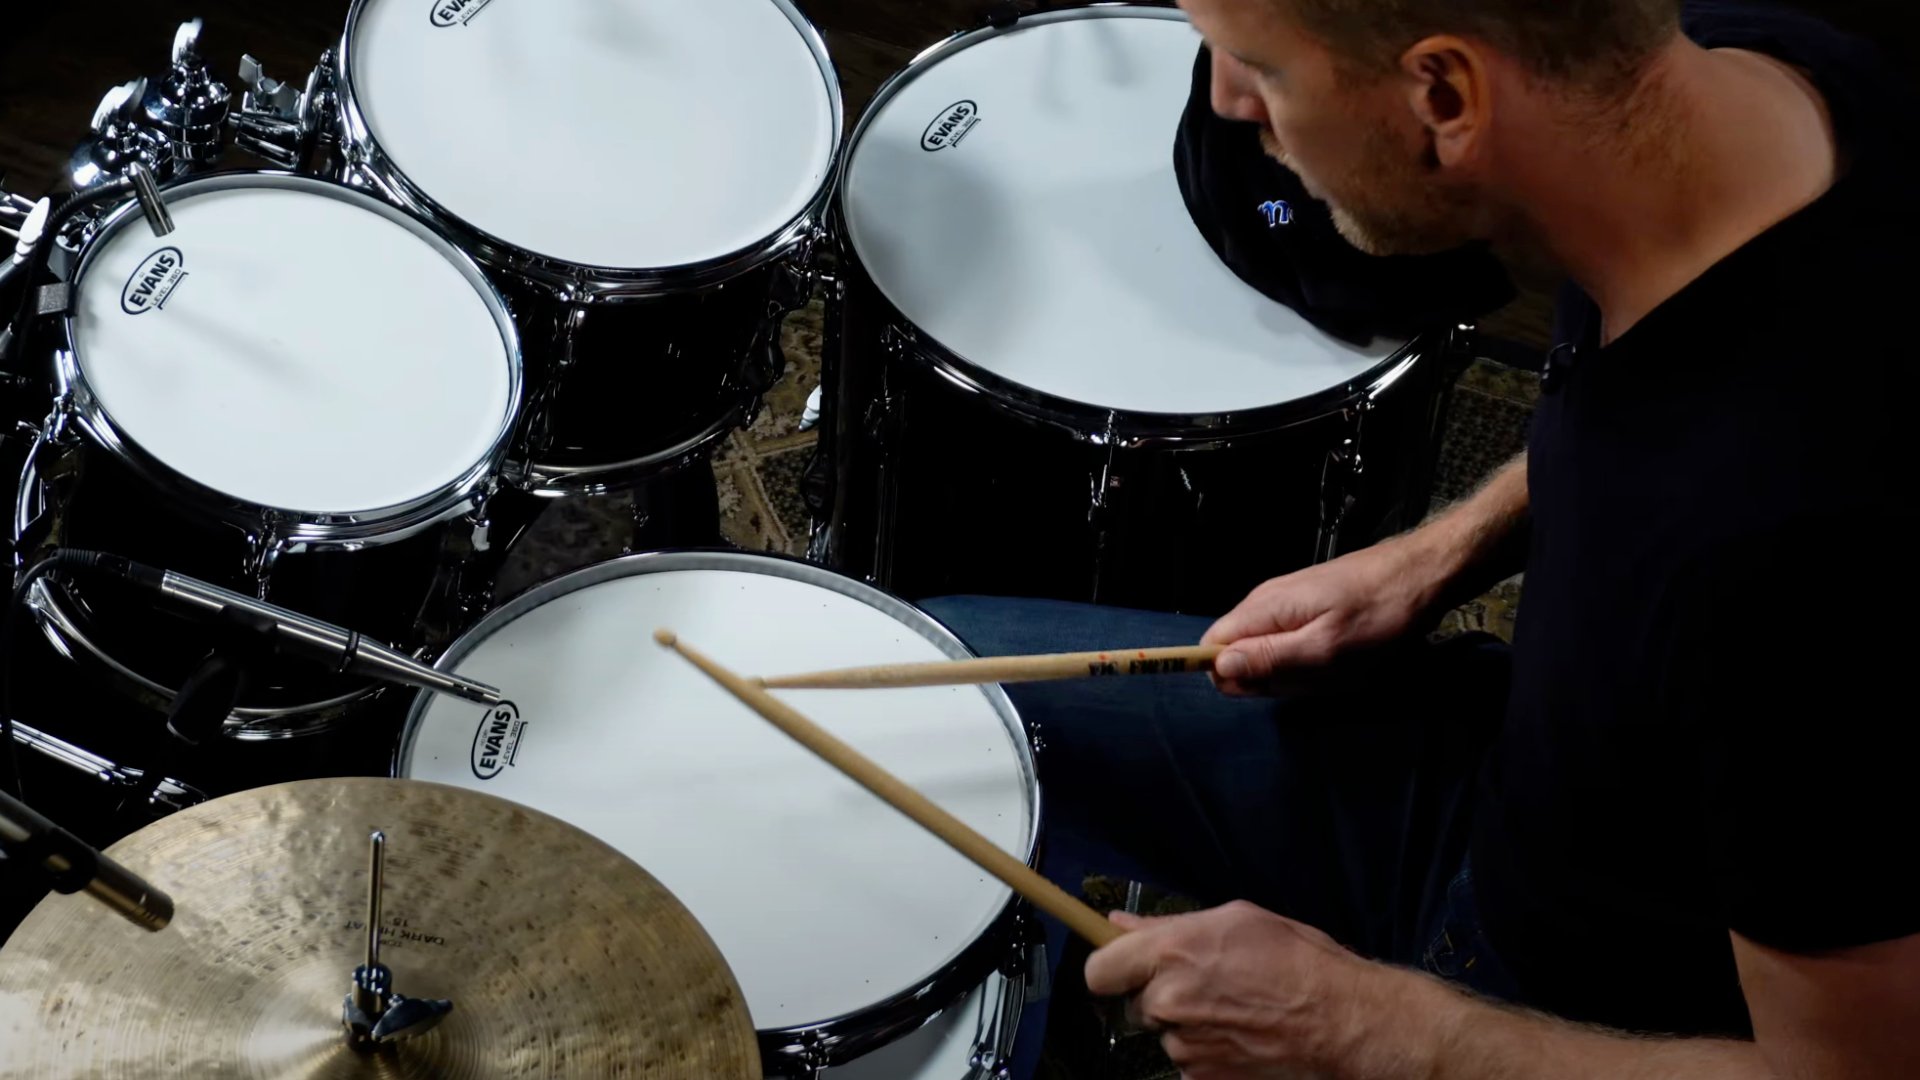
Finally, play the drum kit to test the overall sound and make any necessary adjustments.
For a general tutorial on tuning a whole drum kit, watch this 20-minute video to see it in action (or skip ahead for a detailed drum-by-drum approach):
Tip: If you tuned a drum too high, drop the rod tension lower than your target pitch and tune up to it.
If you’re new to drums, here’s the anatomy of a typical tom.
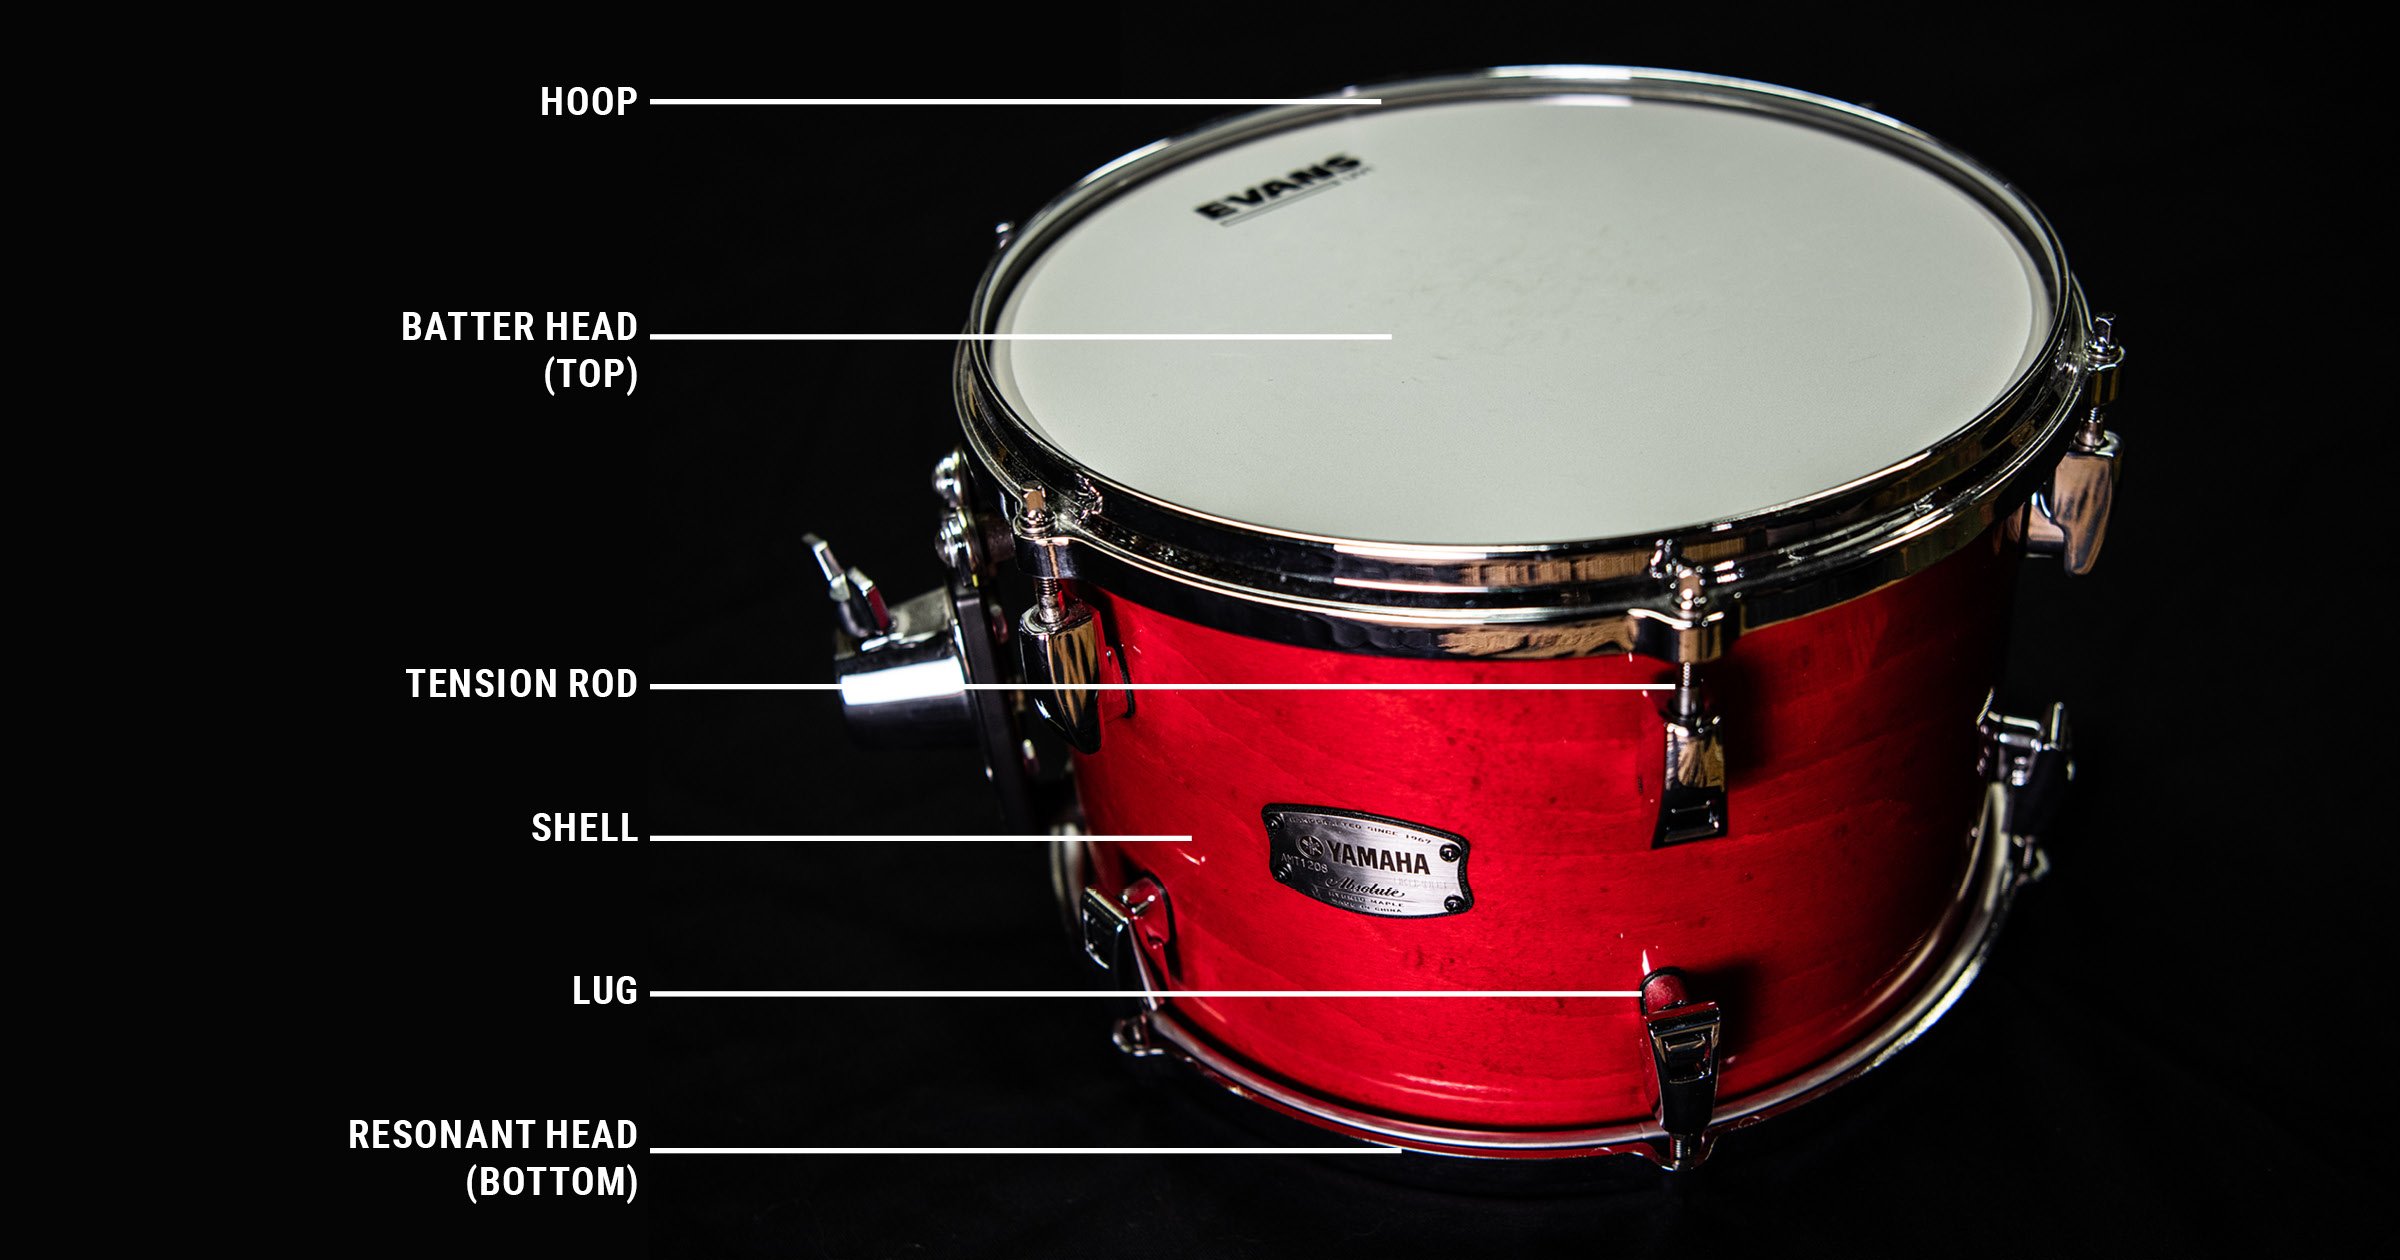
Toms don’t need as much tightening to find the sweet spot.
All tension rods should be nice and loose. Start by finger tightening each one. Getting it ‘finger tight’ means you let the tension rod just touch the edge of the rim. Do this all the way around. If the lugs are a bit tight, use a drum key to make sure each one is touching the rim.
If you’re putting on new heads, make sure the tom is on the floor and press down firmly on the center of the drumhead with your hand to stretch it out. As you stretch the head, some tension rods might loosen a bit, so double check that everything is still finger tight, making adjustments as needed.

Start with your smallest tom, bringing up the tension in a star pattern: give the rod closest to you one full turn to increase the tension, do the same with the one across from that, and so on (check out the ‘how to tune a snare drum’ section for an example). Hit the drum – if it sounds a bit flat, tighten all the tension rods with another quarter turn. The ultimate sound you should get from the tom is that initial attack, followed by a nice, even tone that gradually tapers off (not the immediate and jarring boing of a pitch bend).
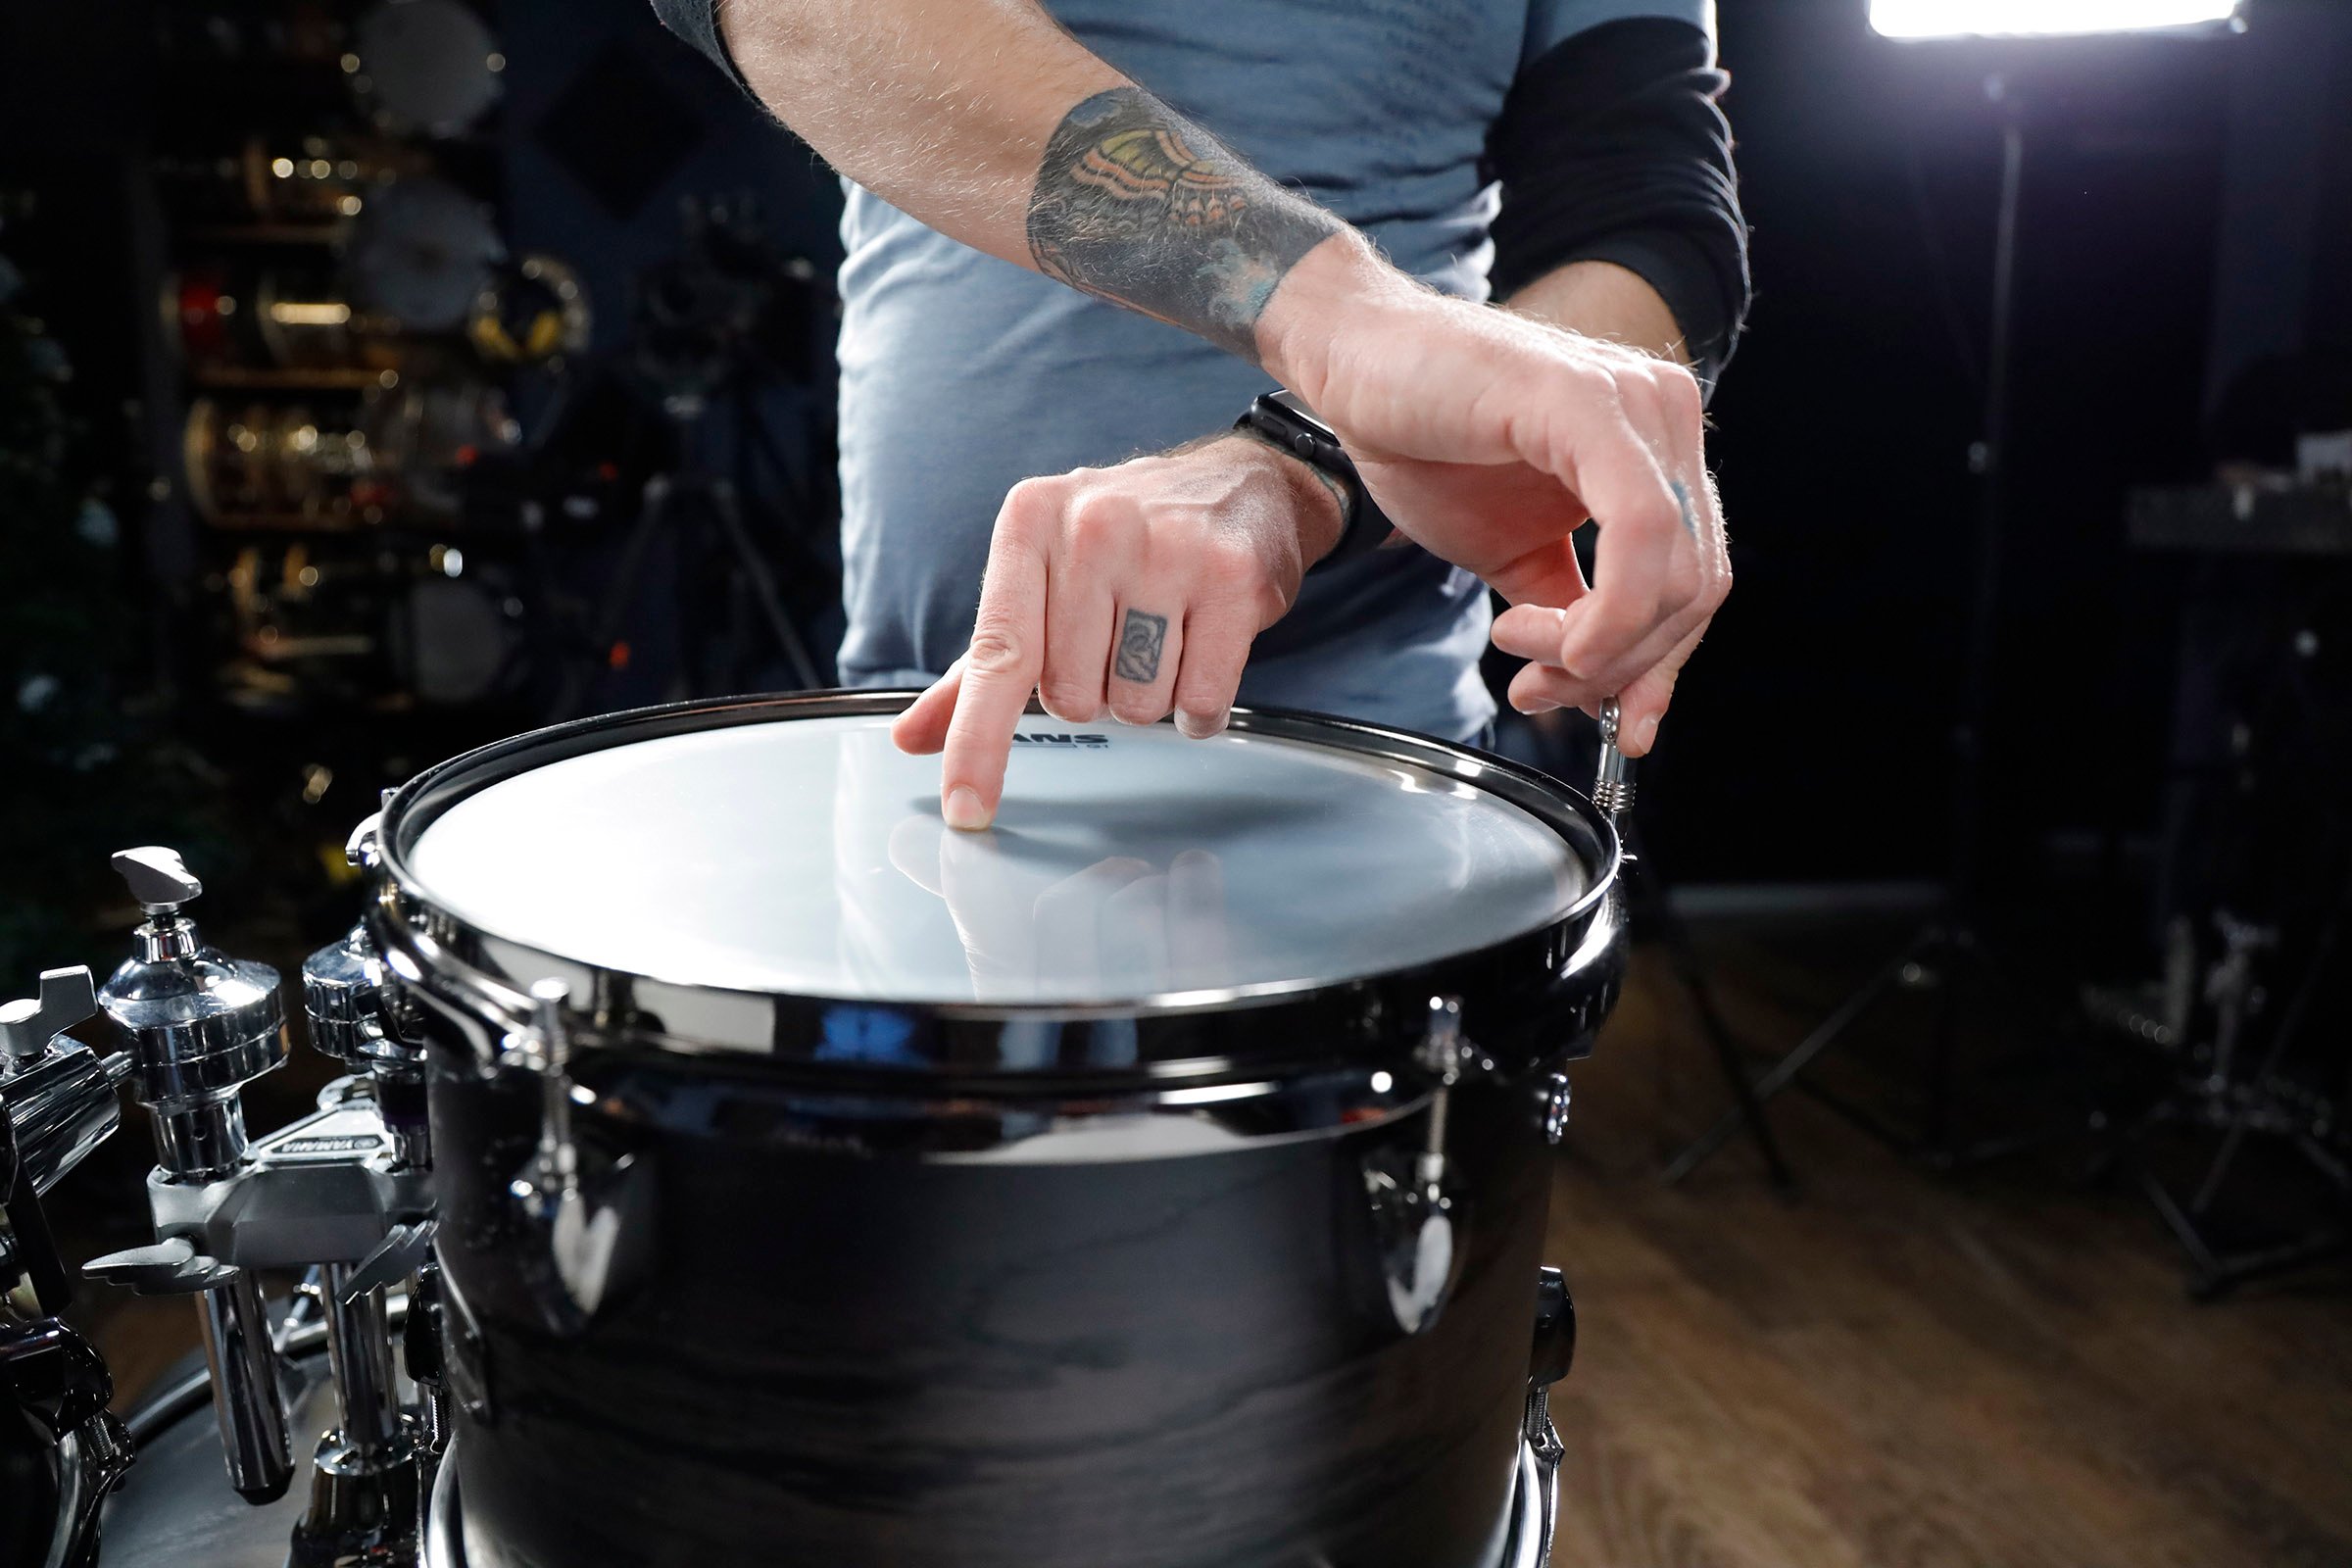
Match the pitches between lugs. Place a finger in the middle of the drumhead while you use a stick to tap around the drum. Tighten or loosen any tension rods accordingly.
For the resonant head, try to get a similar pitch/note. You might want to tune the reso head a bit lower than the batter side, but see what works for you. To confirm an even tension around the drum, tap on the head close to each lug.
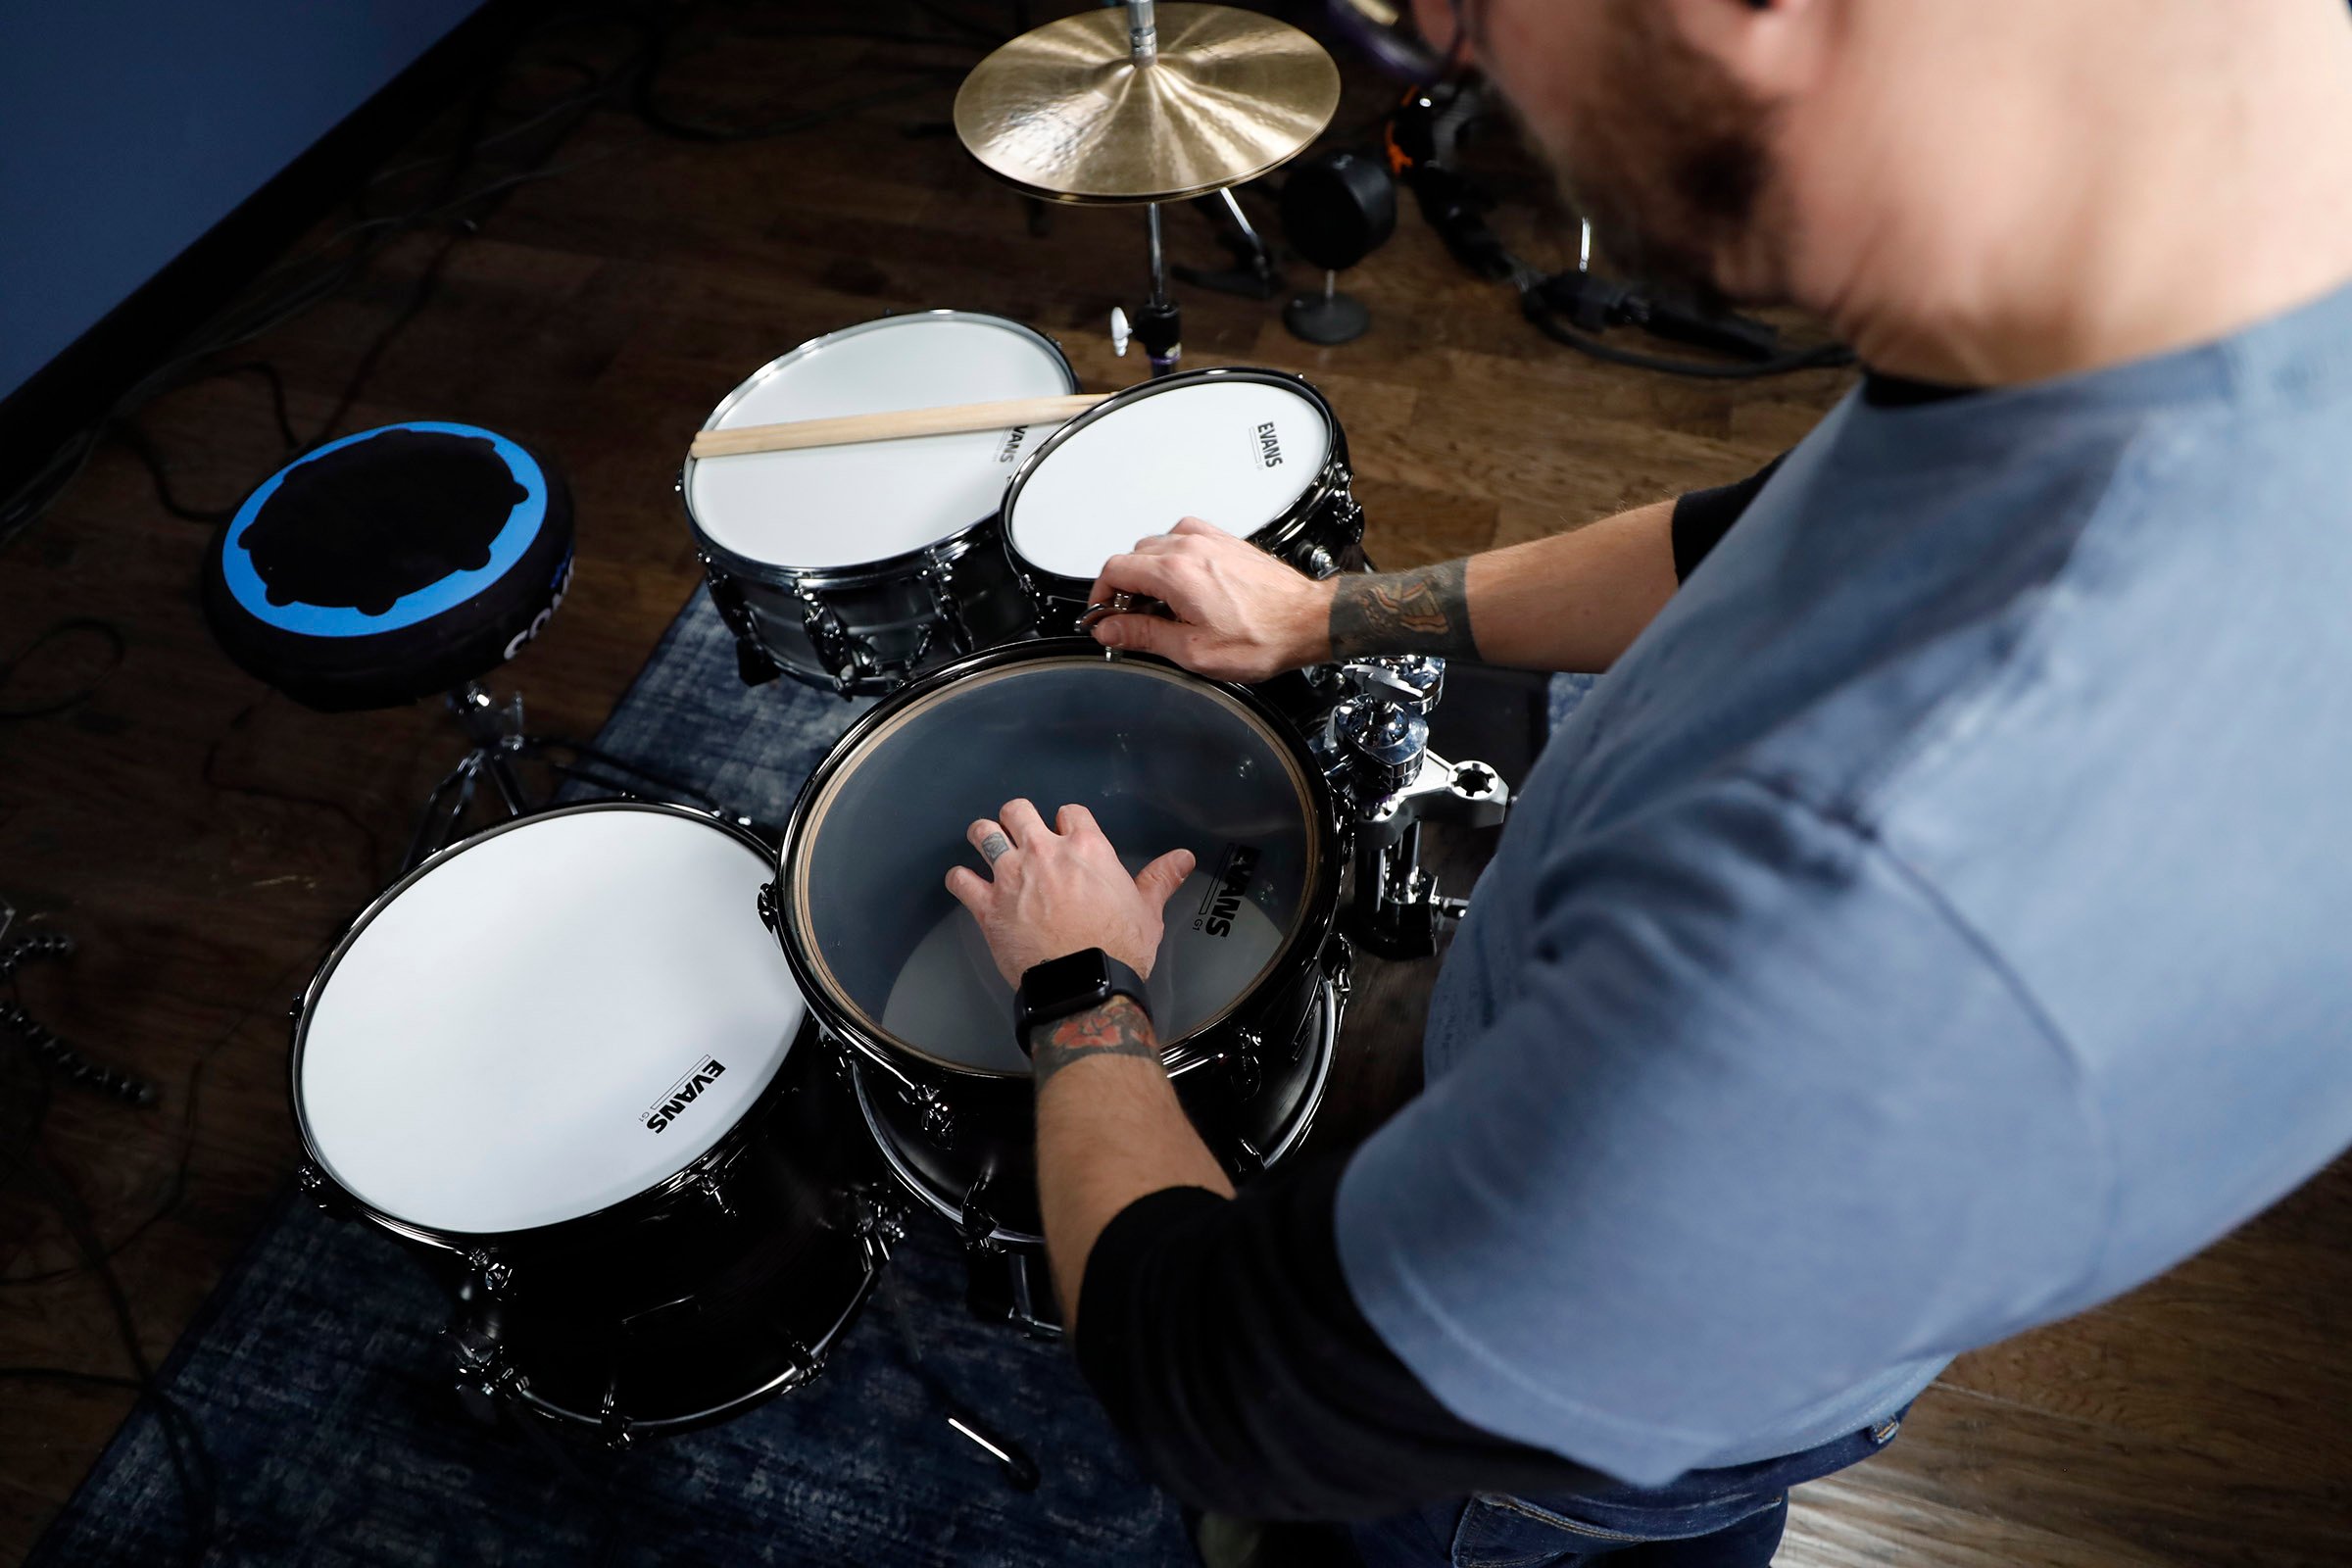
Tune your next tom, giving each tension rod a full turn to start, then give each one another half turn if you need a slightly higher pitch.
Compare the drums’ pitch to each other. It’s okay if the notes aren’t evenly spaced (a third, a fifth) between drums if it matches how you hear it in your head. Refer back to the ‘different types of tuning’ section for more on figuring out which pitches you want.
To tune a floor tom, give each tension rod half a turn, going around the drum in a star pattern. Now hit the drum and compare how it sounds to the other toms. Think about giving it another quarter turn. Next, tap the head around the drum in front of each lug to make sure the pitch sounds consistent between all of them.
If you get stuck on one stubborn lug, try tuning the lug across from it instead.
If you’re new to drums, here’s the anatomy of a typical snare drum (most standard 14” snare drums have 10 lugs).
Your choice of drumheads makes a big difference. If you want a more controlled sound, you’ll need a thicker head (2-ply) like an Evans EC2 (or shop in Europe), Evans G2 Coated (also available in Europe), Remo Pinstripe (in Europe) or Remo Emperor (also in Europe). If you’re looking for something really responsive with more sustain, get a 1-ply head like an Evans UV1 (also available in Europe) on the toms, or an Evans Genera HD Dry (shop in Europe) — the one in the video in the ‘how to tune drums’ section above — or Evans UV1 on the snare drum.
Don’t forget to ‘throw off’ the snares (with the throw off) while tuning so you can get the true tone from the drum.
Get all tension rods finger tight. Bring the snare drum up to tension with a full turn of each one, moving in a star pattern around the drum. Use a drumstick to tap around the drum by each tension rod and listen for a consistent sound. Try to bring up the snare nice and tight right away.
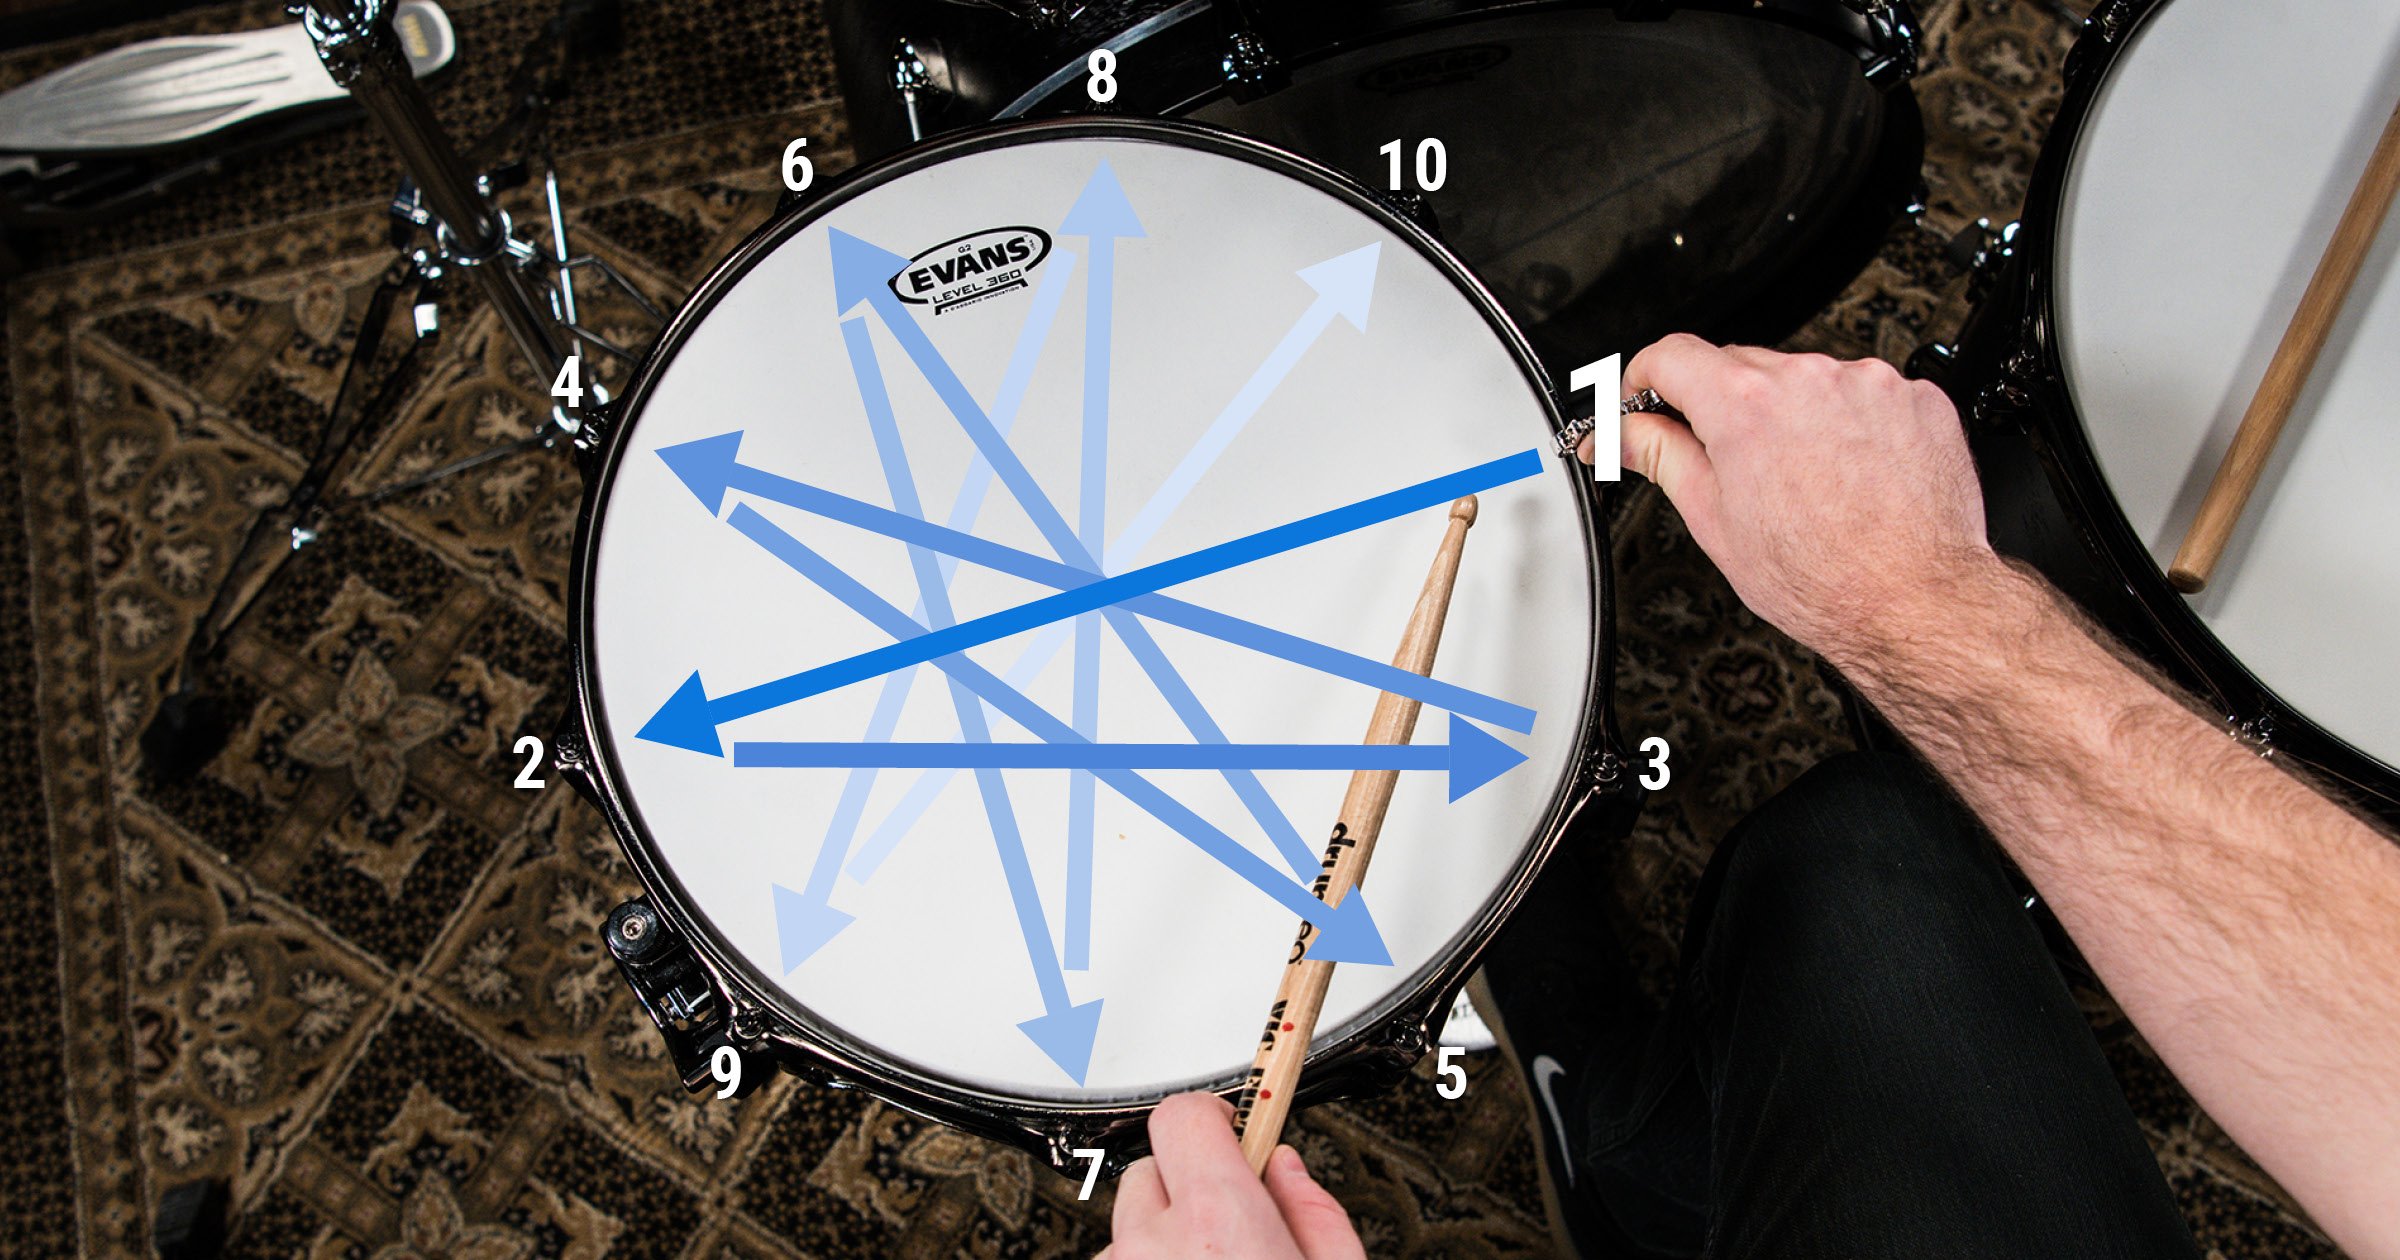
Once you have the overall sound in the range you’re looking for, test the pitch by tapping around the drum.
For the snare’s resonant head, detune it like the batter head. Tune it ‘tabletop tight’: so flat you could confidently rest a drink on it (don’t do this, though).
Bring up each tension rod another quarter turn. You want to hear the wires, but not so much that it overwhelms the attack.
Tap the head beside each tension rod, then start to even out the pitch with the tension rods so they all match.


If you aren’t changing the reso head, loosen the snare strainer and place a stick under the snares to keep them out of the way while tuning.
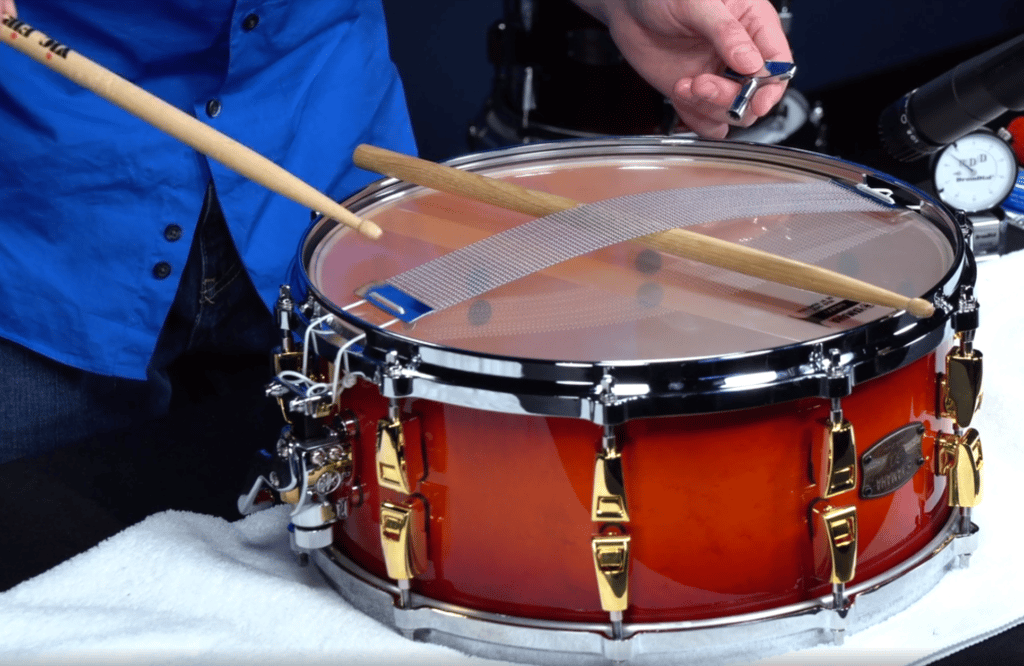
So to recap, here’s the simplest way to tune a snare drum:
For more snare tuning visuals, watch this video:
Bass drums are usually about attack and response, so you can start by tightening just enough to smooth out the wrinkles and try it out from there.
However, keep in mind that for certain styles – like jazz – you might want to treat the bass drum like it’s another tom and tune it to a specific pitch.
Turn the bass drum on its side, batter side up, and detune the head. If it’s a new head, press your palm in the middle to stretch it out. If you want to muffle your bass drum, you can use something like Remo’s internal muffling system, or you can just put some beach towels inside. It should go without saying, but put any muffling inside the drum before you replace the heads!

Bring up all tension rods to finger tightness. If you want a tone out of the drum, you can use a mallet and pitch match each section of the head. Otherwise, just bring everything up to tension. You typically aren’t looking for as much of a tone as you are a certain amount of attack.
If you run your hand around the edge of the drum, there should be no wrinkles. The batter head in the video in the ‘how to tune drums’ section above is an Evans EQ3 (buy in Europe) with internal control rings, which provides lots of attack and a little bit of tone. The batter head in the next slideshow is an Evans EMAD Heavyweight (or shop in Europe), which provides a really focused sound.


Next, tune the resonant head the same way you tuned the batter head. The resonance of the bass drum – and the action on the batter head – often depends on if there is or isn’t a hole in the reso head. A hole lets a lot of air escape every time you hit the batter head. If you want to check the tone, you can do it by feel. Stand the bass drum back up and press the center of the head on both sides, seeing how they compare to each other. If you notice any wrinkles, tighten the tension rod nearest to the wrinkle.
Tuning drums really is about personal preference. It can take some time to find the heads, tension, and pitch that you like the most. It’s not rocket science; you just have to put in the work. Once you have a method and sound that works for you, eventually you won’t even have to think about it.
If your bass drum echoes too much for your liking, or your pedal’s rebound and response isn’t working for you, there are many dampening and muffling options. You can put a blanket or towel inside, or pick up a head with a built-in muffling system.
For an idea-packed article just about muffling a bass drum, click here.
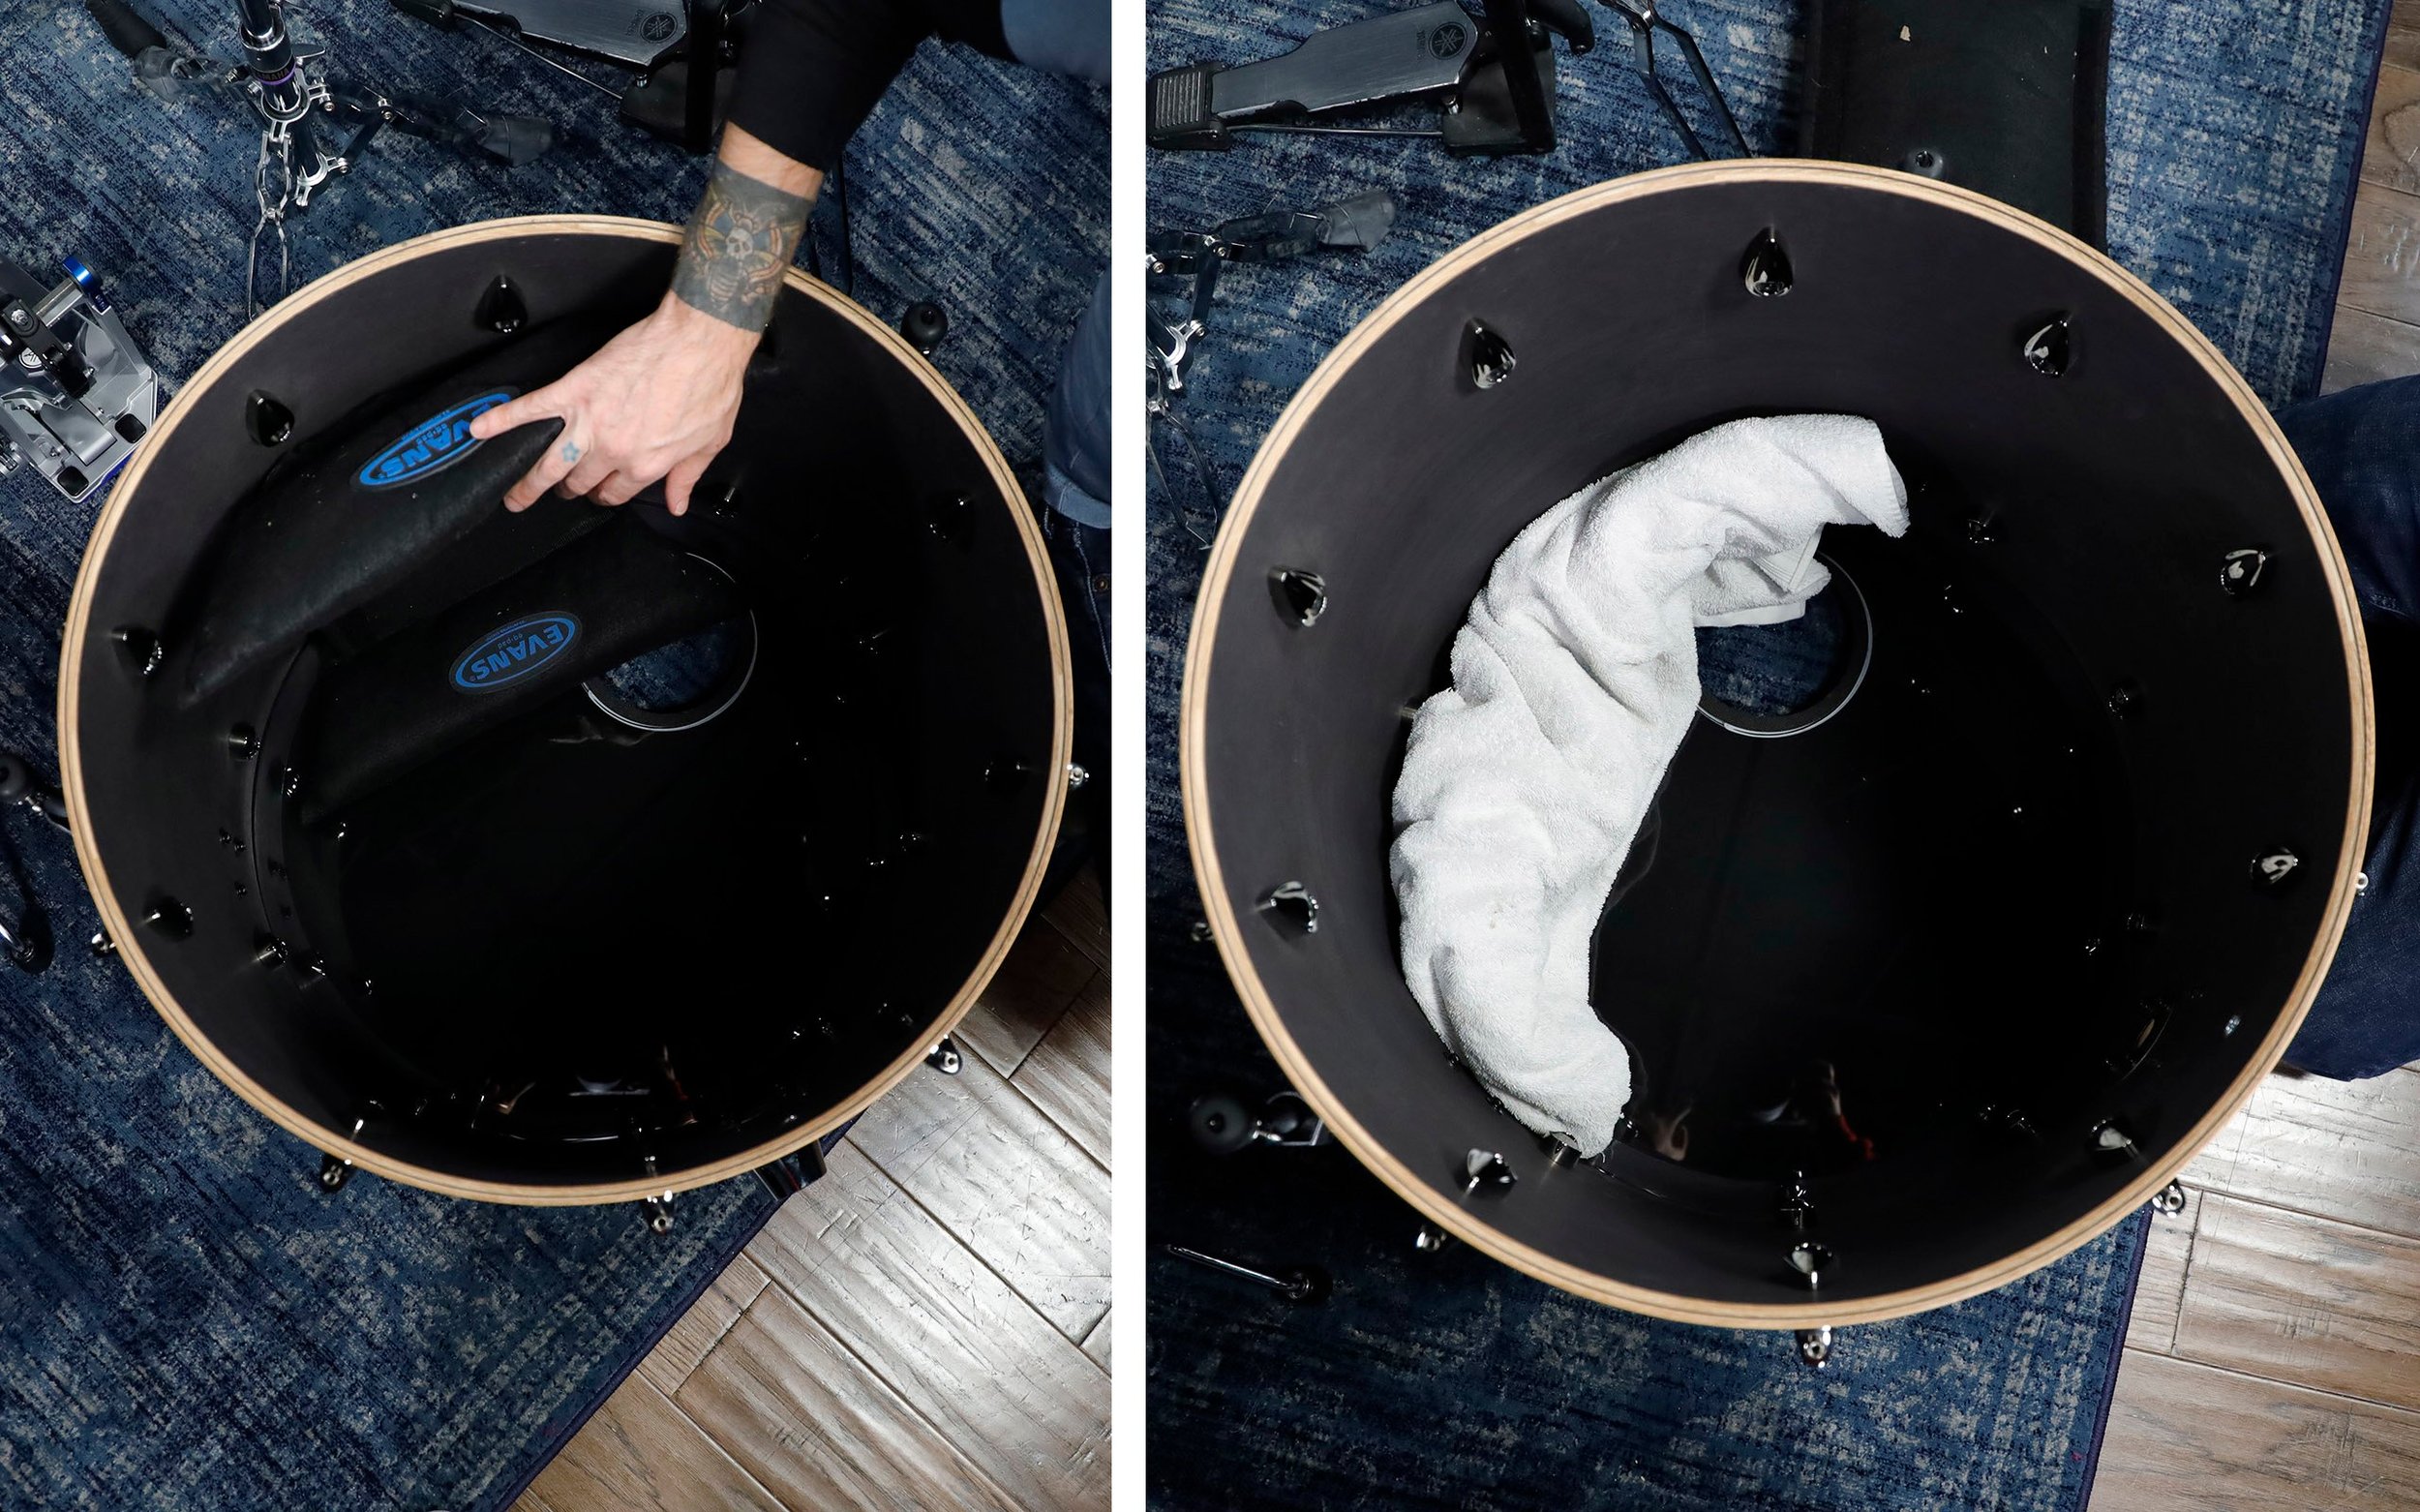
You can buy something like the Evans EQ Pad damper, or roll up a towel.
If you’re using a kick trigger (here’s looking at you, metal drummers), the tightness/slackness of the head and the ability of air to move inside the drum can make a huge difference in your trigger response.
And if you’re using triggers or other electronic elements to hybridize your acoustic kit, this short video has some good tips on why to not tune your bass drum and floor tom to the same pitch (and more):
Another thing you should consider when tuning your drums is the room. Is the kit in a small studio? On an outdoor festival stage? A theater venue? Here are some quick tips to get the best sound out of your drums while working with the environment they’re in.


Each style of music has certain standards for how people expect the drums to sound. You can choose to be a rulebreaker, but you should generally try to tune according to the genre. The standards are there for a reason: because they’ve helped to define that style!
Here are a few popular genres to help guide your drum tuning choices.
This tuning can also work for country, slower subgenres of metal, and other styles where you want a low, boomy sound. Opt for 2-ply heads for durability during those heavy-hitting sessions.
Snare drum: Tune the snare down for a fat sound, or way up for a ‘crack’. Metal snare drums (brass, aluminum, steel, or titanium) are great for rock.
Toms: Tune them lower than usual. And the lower they are, the less muffling you’ll need.
Bass drum: A deep tuning will give you the ‘thump’ you need.
Higher tuning is typical for jazz, especially if you want that classic bop sound (though many modern players do tune lower and use larger drums).
Snare drum: Tune the snare up for crisp, clean comping.
Toms: Tune them in intervals of perfect 4ths or minor 3rds. Get a vintage sound by tuning your reso heads higher than your batter heads.
Bass drum: Tune the kick drum high so it resonates clearly and sounds more like a tom.
Use 2-ply clear or coated heads for this style. For modern gospel music, you can tune like you would for rock playing.
Snare drum: Both down-tuned and cranked-up snare drums are common.
Toms: Tune them low.
Bass drum: Tune the kick low as well.

You’ll want a beefy snare drum that can cut through guitar distortion, punchy toms to get the articulation from fast rolls and fills, and a tight, muffled bass drum for the quick response needed for fast footwork.
Snare drum: A lower, fatter sound paired with a metal drum is perfect.
Toms: Tune higher if you’re playing a lot of quick fills, or lower for a slow thunder.
Bass drum: Like the toms, tune the kick tight for a quicker rebound if you’re doing fast rolls.
With high-tuned toms and a distinct snare ‘ping’, this tuning can work for many Afro-Caribbean styles.
Snare drum: A medium/high tuning works best.
Toms: Go for a medium/high tuning so you can play melodies on the toms.
Bass drum: Medium tension should work great.
Why do drummers muffle (or dampen) their drums sometimes? Because of how they’re constructed, drums produce natural tones that, in combination with how your heads are tuned (and resonating), can ring out more than you’d like.
Dampening the drum by either placing something on or inside of it can help shorten the sustain and reduce overtones (an annoying ring, or ‘extra’ harmonics that result after you play the initial fundamental note). It gives you more control over the sound than tuning alone can offer. They can also make your drums quieter.
You don’t need to dampen your drums, but if you want less ring, a quicker response, a slightly different sound, or a quieter kit, dampening might solve some of these issues. Drums will sound completely different in different environments as well, so we often turn to dampening to gain some control over the tone.
In case you missed the ‘how to muffle a bass drum’ section (scroll up for a video and a link to a more in-depth article on that topic), you can put a blanket or towel inside, buy a drumhead with a built-in dampening system, or pick up other specialty sound control options.
These are all things you can use to muffle your drums:
Watch this video for examples of how different types of muffling can change the sound of your drums:
Sure, tuning is sometimes objective – like finding the pitch a drum resonates best at – but it’s mostly about personal preference. What works for someone else might not sound good to you, and vice versa.
It can take some time to find the heads, tension, and pitch that you like the most. It’s not rocket science; you just have to put in the work. Once you have a method and sound that works for you, eventually you won’t even have to think about it. You’ll find that you develop a better ear over time.
If you want more demos and tips on drum tuning, check out the video tuning course in our Ultimate Guide To Recording Drums for Drumeo members!
Or if you’re a brand spankin’ new drummer and you aren’t ready for a full subscription to online lessons, click here for an easy-to-follow video course that’s only $7. You’ll be playing your favorite songs within 90 days – no joke!
*This article contains affiliate links, which means we might earn a small commission from the product seller if you make a purchase. For more info, check out our privacy page.
Samantha Landa currently drums with Conquer Divide and has been featured by outlets such as Sick Drummer Magazine and DRUM! Magazine. Sam proudly endorses Mapex Drums, Sabian Cymbals, Evans Drumheads and Los Cabos Drumsticks.


By signing up you’ll also receive our ongoing free lessons and special offers. Don’t worry, we value your privacy and you can unsubscribe at any time.
We use cookies for traffic data and advertising. Cookie Policy »